
Mac Apps
Bloom 1.5.43
Mac AppsUpdated
| Requirement | On file |
|---|---|
| macOS | macOS 14 or later |
| CPU | Apple Silicon, Intel 64-bit |
| Download | 19 MB |
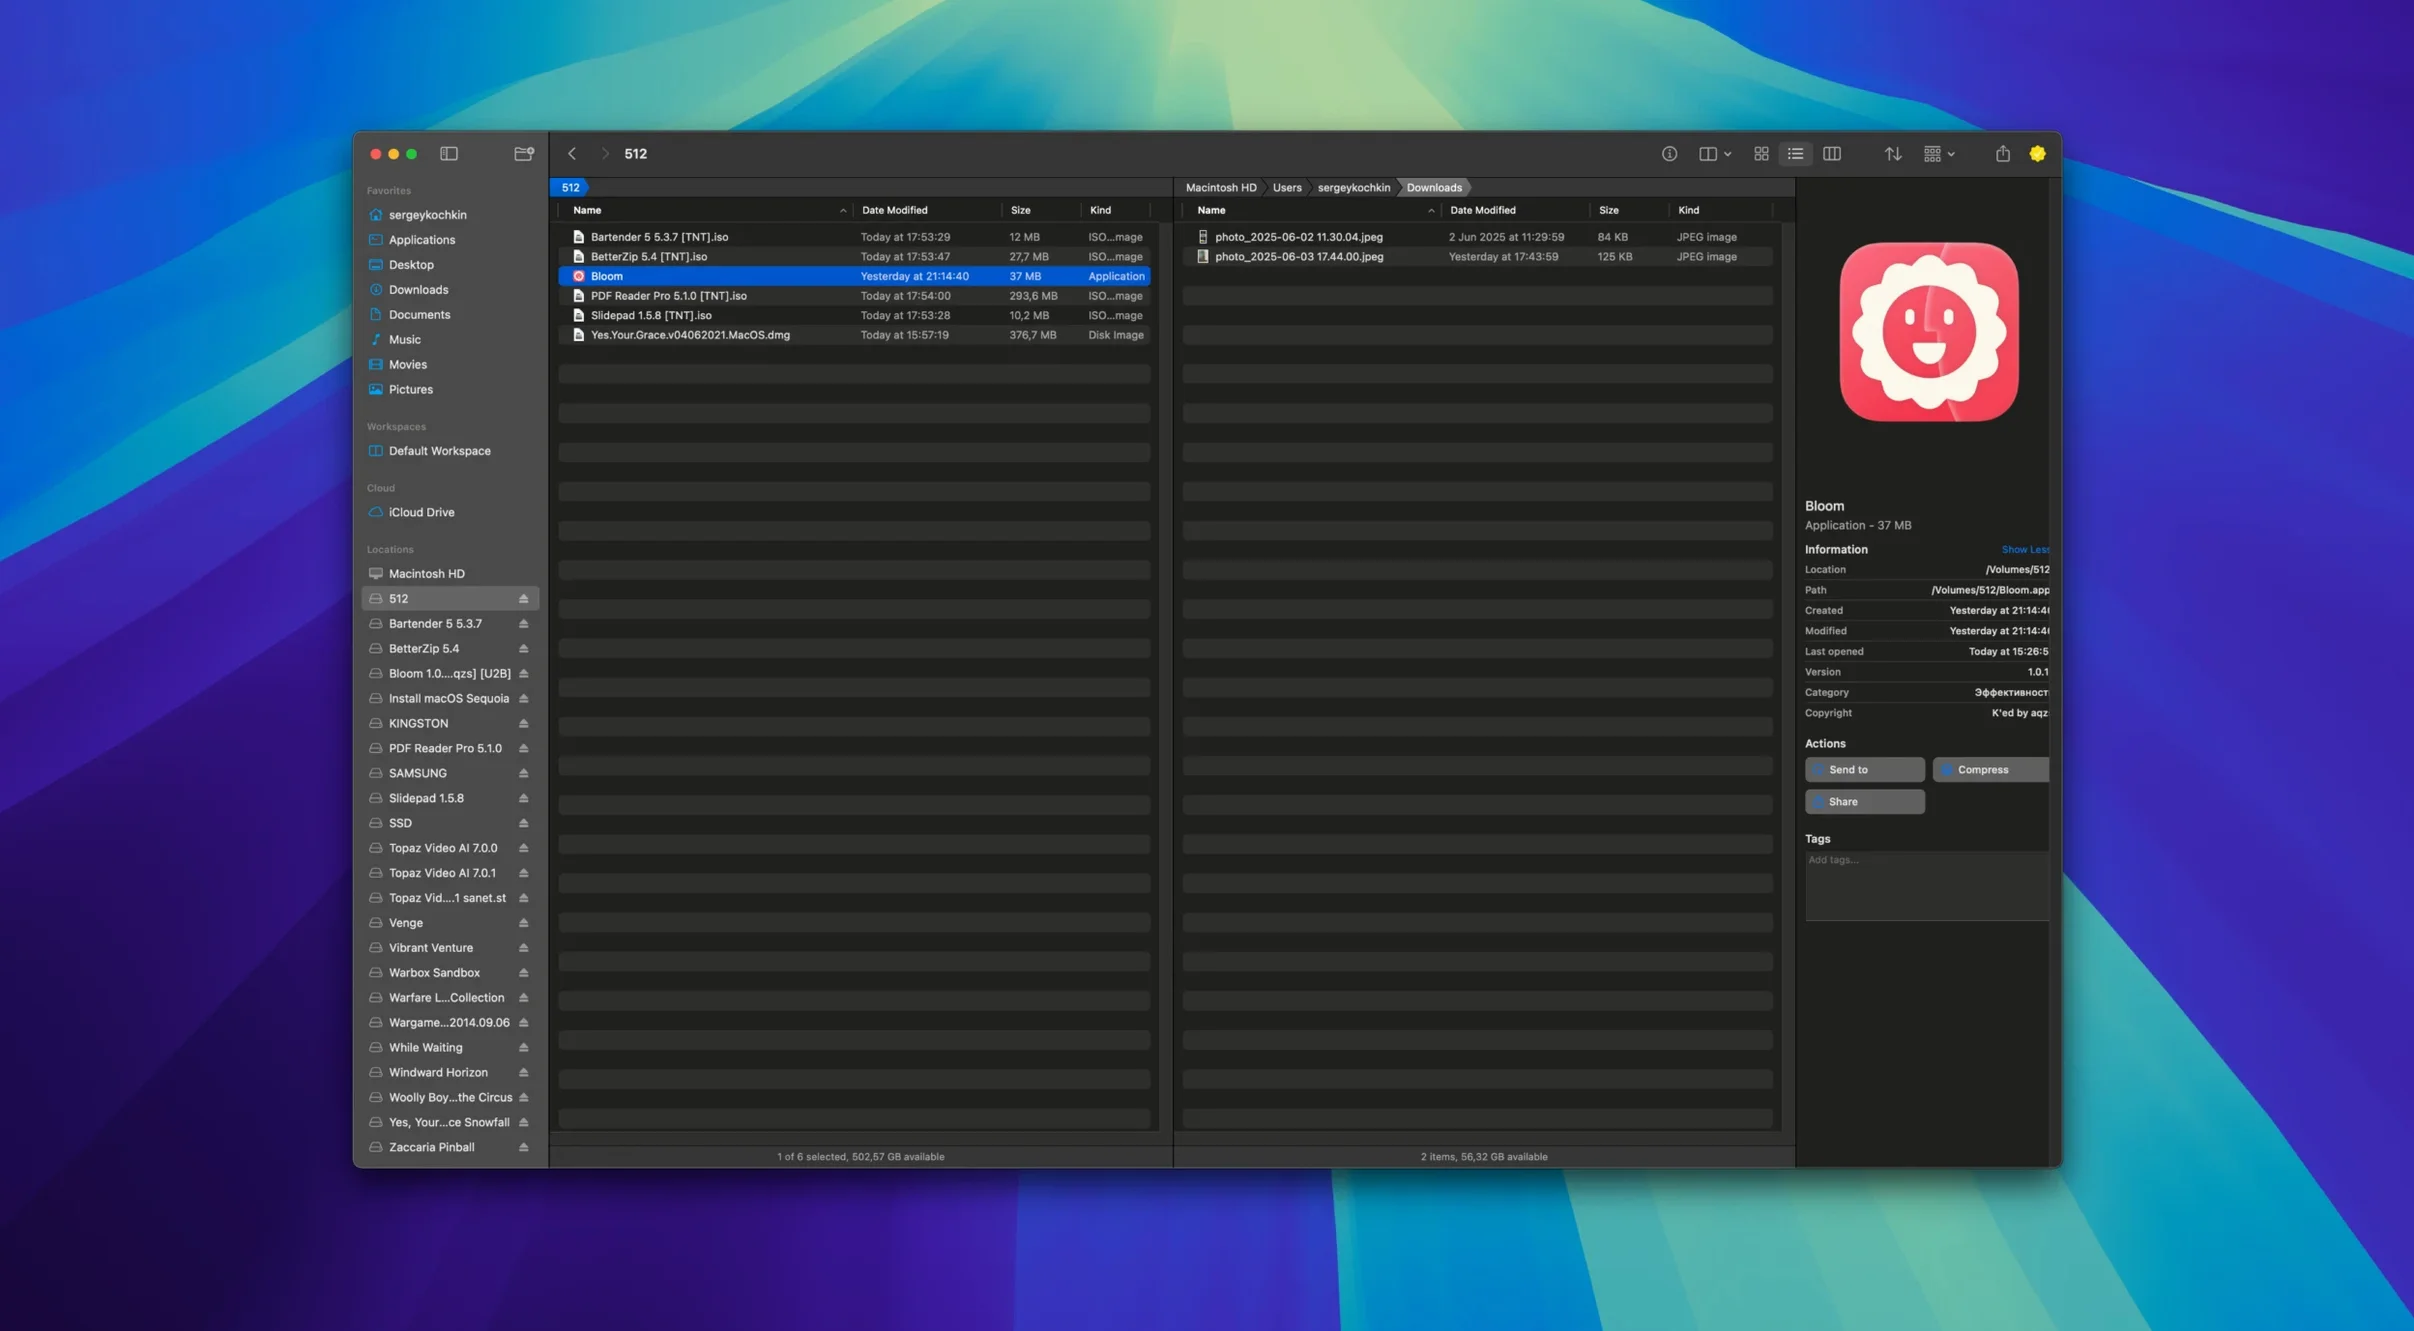
Finder works until you need to keep one folder visible at all times, preview a dozen archives, or drop into Terminal from the current location without a detour. Bloom steps into that gap. It rethinks file browsing around workspaces you can customise and a Portal window that stays pinned above other apps or docked to the screen edge — a small shift that changes how you move between folders.
Bloom runs on Apple Silicon and Intel Macs and requires macOS 14. The interface is English only. iCloud Drive appears as a first-class location alongside local volumes, so cloud‑stored projects don’t demand a separate Finder tab. Text, image and PDF previews work inline, though the 10 MB file‑size ceiling for previews means larger design mockups or multi‑layer PDFs will still need an external viewer.
One of the more practical touches is archive handling: you can browse inside a zip or tarball without extracting it first. Combined with folder‑based keyword search across predefined locations and a ⌘R shortcut to refresh results, it cuts down the back‑and‑forth that Finder imposes when you’re hunting for a specific revision. A task scheduler for file operations — moves, copies, renames — lets you stage jobs to run later, which suits end‑of‑day housekeeping scripts.
The built‑in Terminal launcher opens a shell at the current folder, so there’s no need for a separate “cd” path. It’s a small detail, but for anyone who splits time between GUI browsing and command‑line work, it removes a consistent friction point. Bloom doesn’t replace Finder entirely — it layers on top, giving you a second pane of glass for the jobs Finder handles awkwardly.
Narrow the sidebar to 140 px for more working room
Out of the box, Bloom uses a set of defaults that lean conservative. Three adjustments make an immediate difference.
First, switch the sidebar width from its default 180 px to something narrower — 140 px keeps folder names readable while reclaiming horizontal space for the file list. You’ll find the setting under View → Sidebar Width. The change persists across workspaces, so you only need to do it once.
Second, enable automatic column resizing if it’s off. The feature appears in View → Auto‑Resize Columns and adjusts column widths whenever you switch folders or resize the window. Without it, you’ll find yourself manually dragging the Name column after every navigation step, especially in folders with deeply nested paths or unusually long filenames.
Third, set your preferred workspace layout and save it as a named workspace (File → Save Workspace As…). Bloom ships with a single default layout that shows the sidebar, a three‑column file list, and the preview pane. You can collapse the preview pane entirely, switch to a two‑column list, or keep the preview but move it to the right edge. Once saved, you can jump back to that arrangement with ⌘1 through ⌘9 — the first nine workspaces get keyboard shortcuts automatically. If you work across multiple displays or switch between a laptop screen and an external monitor, saving a workspace per screen setup avoids constant manual rearrangement.
Keep the Portal window from vanishing behind other apps
Several friction points surface early, and they’re not always obvious from the interface.
Portal window disappears behind other apps. The Portal mode creates a compact, sidebar‑free window, but it doesn’t float by default. Right‑click the Portal’s title bar and choose Keep Above Others — the setting is per‑window, not global, so you’ll need to set it once for each Portal you open. If you dock the Portal to the screen edge instead, the pinning behaviour activates automatically, but a docked Portal cannot be resized without undocking it first.
Preview refuses to load for a file that’s clearly under 10 MB. The size check runs against the file’s reported byte count, not its on‑disk usage. Files with extended attributes, resource forks left over from older macOS metadata, or sparse bundles can report a size slightly above the threshold even when the actual data is smaller. The workaround is to duplicate the file with File → Duplicate inside Bloom — the copy strips the excess metadata and usually loads in preview.
Search misses files you know are there. Bloom’s folder‑based search with ⌘F only indexes the current folder and its immediate children by default. If you’re searching a top‑level directory expecting it to crawl the entire subtree, you need to toggle Search → Include Subfolders before typing the keyword. The ⌥⌘F shortcut does this automatically, opening a search field that targets all nested levels of the active folder.
Rename with regex produces unexpected results. The advanced renaming panel accepts Perl‑compatible regular expressions, but it applies transformations to the entire filename including the extension unless you tick Ignore Extension in the rename dialogue. Forgetting that checkbox is the most common reason a batch rename corrupts file types — turning photo.jpg into photo_2024 with no extension, which then won’t open on double‑click.
Task scheduler jobs don’t fire at the expected time. Scheduled file operations depend on Bloom staying open. The scheduler is not a background daemon — it runs inside the app process. If you quit Bloom before a scheduled task’s trigger time, the job sits queued and executes the next time you launch the app. For end‑of‑day housekeeping scripts that run at 2 a.m., leave Bloom minimised rather than quitting it.
Jump straight to ~/Library with ⌘⇧⏎
A handful of features are tucked into menus or triggered by key combinations that aren’t advertised in the toolbar.
- Instant system‑location jumping: ⌘⇧⏎ opens a text field where you can type a path like
~/Library/Application Supportand jump straight there. It accepts tilde notation, full POSIX paths, and even/Volumesfor external drives. Faster than clicking through the sidebar hierarchy when you know exactly where you’re headed. - Treemap disk‑usage scan: Right‑click any folder and choose Scan with Treemap. The view renders nested rectangles proportional to file size, colour‑coded by type. It exposes space hogs — old virtual machine bundles, cache folders, or stray
.dmgfiles — that a flat list view obscures. Clicking a rectangle selects the file in the main browser. - Image conversion from the context menu: Select one or more images, right‑click, and pick Convert & Optimize. The dialogue lets you change format (JPEG, PNG, WebP, HEIC), set a maximum dimension, and adjust quality on a slider from 0 to 100. It processes files sequentially and writes new copies alongside the originals, appending the format name to avoid overwriting.
- Creating new file types without opening another app: File → New File… offers a list that includes plain text, rich text, CSV, Markdown, and a blank HTML document. Choosing one creates an empty, correctly named file in the current folder and opens it for immediate editing — no need to launch TextEdit or a code editor for a quick scratch file.
- ⌘R for search refresh: After you’ve moved or renamed files in another app, Bloom’s search results don’t update live. Tapping ⌘R re‑runs the last query against the current folder state. It’s faster than clearing and retyping the search term, especially with long or regex‑heavy queries.
- Organise by type or date in one step: The Organize command (⌥⌘O) moves selected files into subfolders named after their file extension or modification date, depending on the radio button you choose in the dialogue. For a Downloads folder with 200 unsorted items, it turns chaos into a folder tree in seconds.
A single view for local folder, iCloud share, and zip archive
You’re working on a project that spans a local Documents/Client_2025 folder, an iCloud Drive share from a collaborator, and a zip archive of assets the client sent yesterday. Finder can handle each piece individually, but switching between them means three separate windows and no shared context.
You open Bloom to a saved workspace you’ve named “Client Work.” The sidebar shows your local Client_2025 folder pinned at the top, followed by the iCloud Drive shortcut. You click the iCloud entry and navigate to Shared/Client_2025/Assets. A ⌘F search for hero brings up four PSD files the collaborator uploaded overnight. You tap the spacebar to preview the first one inline — 8.4 MB, well under the 10 MB ceiling — and confirm it’s the right version.
Next, you locate the client’s zip archive in the local folder. Instead of double‑clicking to expand it in place, you open it directly in Bloom’s file list. The archive browser shows its contents as a flat list: twelve images, two PDFs, and a nested folder of fonts. You select the images, right‑click, and choose Convert & Optimize. You batch‑convert all twelve to WebP at 90% quality with a 2000 px maximum dimension. Bloom writes the new files into the same archive view, which means you need to copy them out to a real folder afterward — the archive itself isn’t modified.
You drag the converted WebP files from the archive preview into your local Client_2025/Processed folder. Then you select the originals and
- macOS 14 or later
- Apple Silicon or Intel 64-bit processor
Questions on file
Can Bloom preview files inside a zip archive without unzipping?
Yes, Bloom can display the contents of archives directly in the browser, so you can check what’s inside before extracting anything.
Is there a file size limit for previews in Bloom?
Inline previews for text, images and PDFs work up to 10 MB; files larger than that need to be opened in a separate application.
Does Bloom work with iCloud Drive?
It integrates iCloud Drive as a standard location alongside your local volumes, so cloud files appear in the same workspace.
Sign in · Create an account to add a field note.
No field notes yet. A measurement, a version, a machine — they appear after moderation.