AI Tools
Topaz Photo AI 2.1
AI ToolsUpdated
| Requirement | On file |
|---|---|
| macOS | macOS 11 or later |
| CPU | Intel 64-bit |
| Download | 36 MB |
An otherwise sharp shot ruined by high-ISO noise, or a perfectly framed image that falls apart the moment you crop in. Topaz Photo AI addresses the hardware limits of your camera by reconstructing detail that the sensor missed, running its inference engine directly on your Mac so no image ever leaves the machine.
Passing a Finished Raw to Photo AI for Final Polish
It is not a Lightroom or Capture One replacement. The typical workflow routes a raw file through your main editor for colour and exposure, then passes a high-resolution TIFF or JPEG to Photo AI for denoising, sharpening, and upscaling. Non-destructive real-time previews mean you can adjust parameters without baking in artefacts, and the app reads and writes standard file formats your existing library already understands.
What processing happens on the Mac itself?
All of it. The models for noise reduction, face recovery, and resolution upscaling run against the local GPU (this build targets Intel Macs). There is no cloud round-trip, which matters if you work with client files under an NDA or shoot tethered in a location with patchy internet.
Where does the current Topaz Photo app fit?
Topaz labels the standalone Photo AI v4.0.4 as the final, legacy version. The present Topaz Photo application — version 2.1 — bundles every model from that legacy run and adds newer ones under a single installer. If you held onto an older Topaz Photo AI full version, the current app consolidates and supersedes it.
When Awful Light and Giant Prints Make the Extra Step Worth It
Not every photographer needs a dedicated AI enhancement step between the raw conversion and the final export. The people who genuinely benefit tend to share a few specific shooting conditions or output requirements.
Event photographers working in awful light. Wedding receptions, indoor conferences, theatre performances — venues where pushing ISO 6400 or higher is the only way to get a usable shutter speed. Photo AI's noise reduction lets you deliver clean 2000-pixel-wide proofs without the plastic-skin look that aggressive luminance smoothing usually introduces. Face recovery kicks in automatically when it detects a face smaller than a certain threshold, which happens constantly with dance-floor candids shot at 85mm from across the room.
Someone printing larger than their sensor expects. A 24-megapixel file gives you roughly 20 × 13 inches at 300 dpi. Push that to 30 inches wide and you are asking the printer driver to invent data. The upscaling models in this app understand edges, textures, and repeating patterns in ways a bicubic resample does not. Printmakers who sell gallery wraps or aluminium panels can rescue crops that would otherwise be rejected by the lab's quality check.
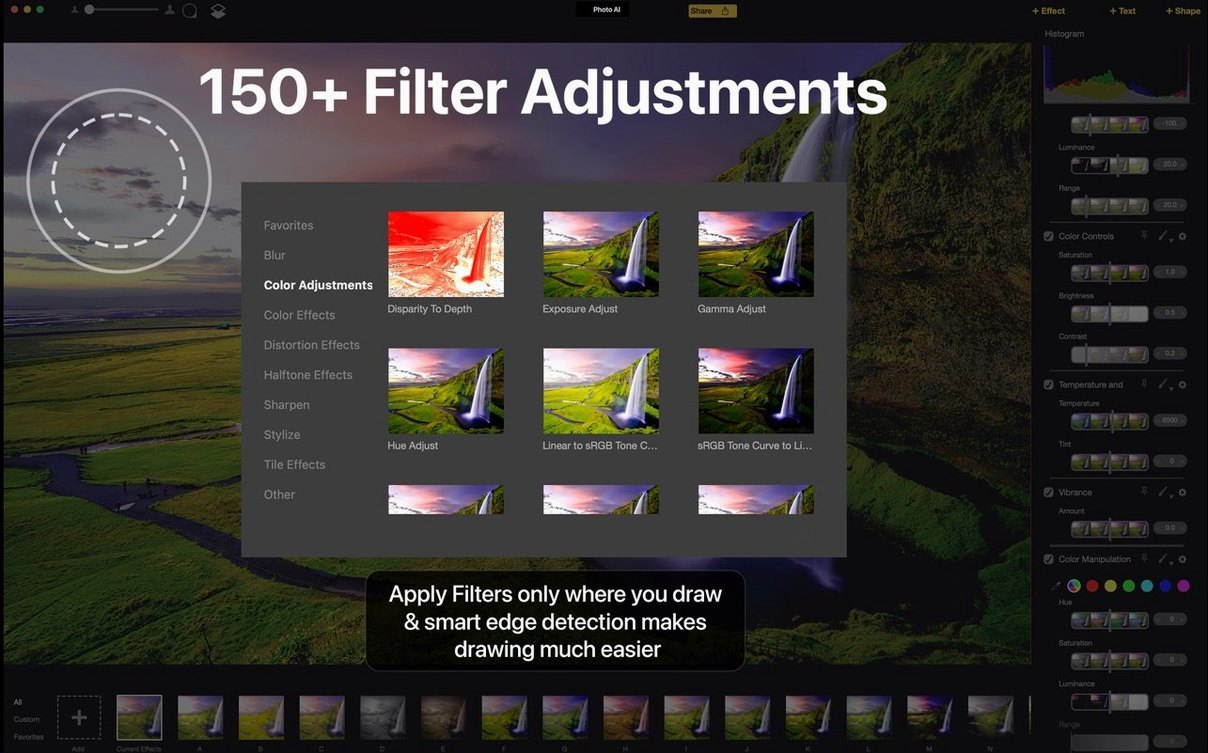
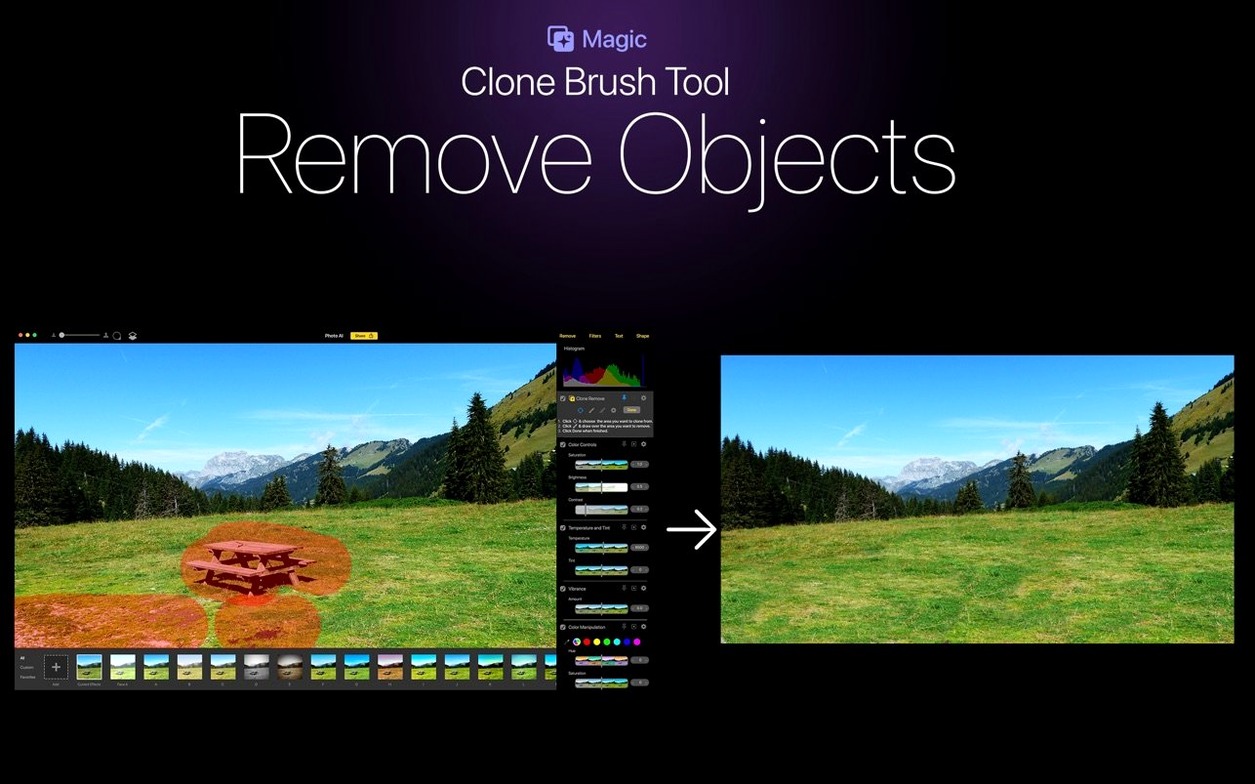
Archivists and restoration hobbyists. Scanned film negatives and old prints carry grain, dust, and softness from the original lens. The app treats these as enhancement problems rather than artefacts to preserve, which is exactly what you want when the goal is a clean digital file rather than a historically accurate copy. The content-aware removal tool takes care of dust spots and scratches in one pass, and the 150-odd filter controls give you enough granularity to balance sharpening against the grain structure of the original stock.
Anyone who crops aggressively. Wildlife and sports shooters who cannot fill the frame with a 400mm lens often end up using a quarter of the sensor area. Upscaling that 6-megapixel crop back to a printable 12 or 24 megapixels is a practical use of the resolution models, and the sharpening pass that follows can pull feather detail or jersey numbers out of what looked like mush at 100%.
What ties these groups together is not skill level or budget — it is that their workflow already produces an edited master file, and the AI step slots in after that master exists. The app does not try to manage a library, sync adjustments across a shoot, or replace the colour grading you already did.
Drag, Drop, and the Hidden File Support You Might Skip
Photo AI's interface is sparse by design, but a few behaviours only become visible after a couple of sessions.
Drag any supported file directly onto the window. You do not need to use the Open dialog. TIFF, JPEG, PNG, and several raw formats are accepted, and the app remembers the last comparison view mode you used — side-by-side, split, or single — so repeated drag-and-drop sessions stay consistent.
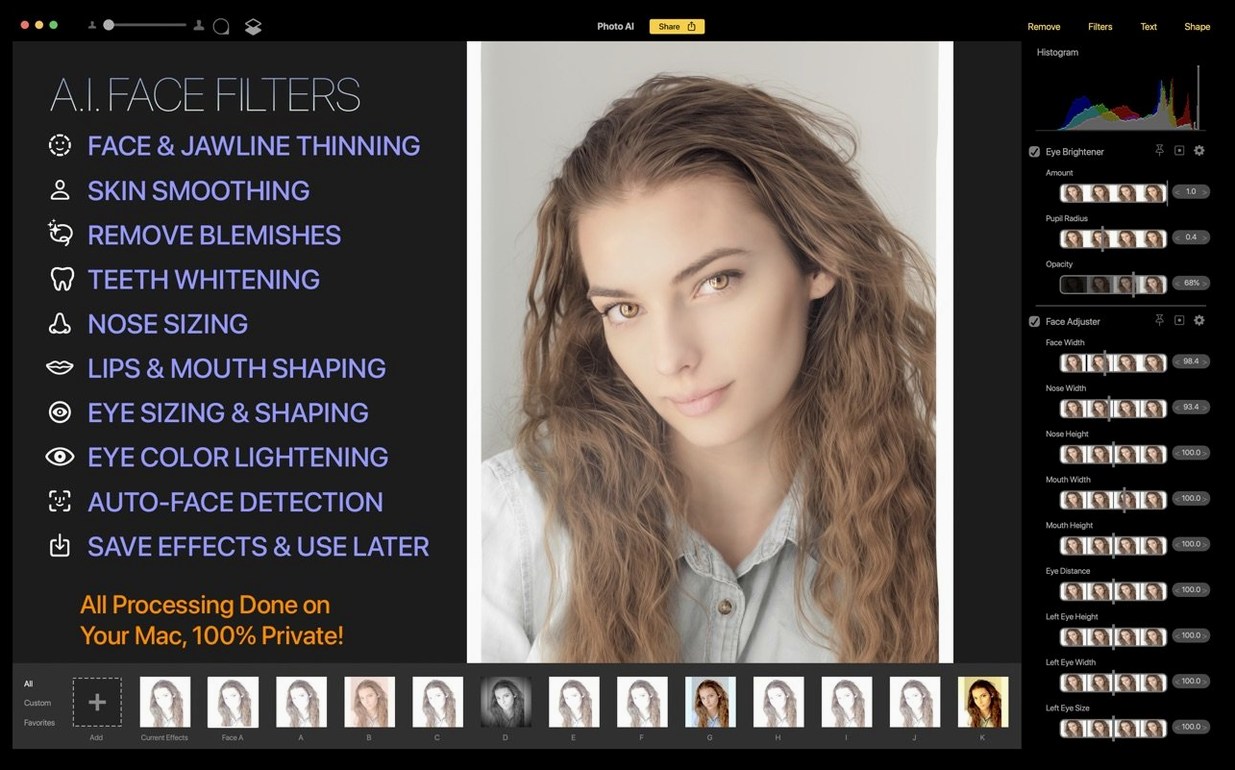
The face recovery toggle is per-face. When the app detects multiple faces in a frame, you can enable recovery for the ones in focus and leave the background faces alone. Click the small face indicator on the preview, and the detail panel lets you adjust the strength or turn it off entirely. This stops the model from trying to reconstruct a face that is deliberately blurred by depth of field.
Upscaling presets match common output targets. The resolution panel offers 1.5×, 2×, 4×, and 6×, but you can type an arbitrary pixel dimension in the width or height field and the app calculates the scale factor. If your lab requires exactly 360 dpi at 24 inches, you plug in the numbers rather than guessing the multiplier.
The comparison view shortcut is the spacebar. Holding the spacebar toggles between the processed preview and the original, and releasing it snaps back. This works faster than clicking the view-mode icons when you are checking noise reduction on a specific shadow area.
Processing queue behaviour. Dropping five files at once queues them sequentially, and the app uses the same settings from the most recent manual adjustment. If you have a batch of images shot at the same ISO in the same light, configure the first one, confirm it, and let the queue handle the rest without re-entering parameters each time.
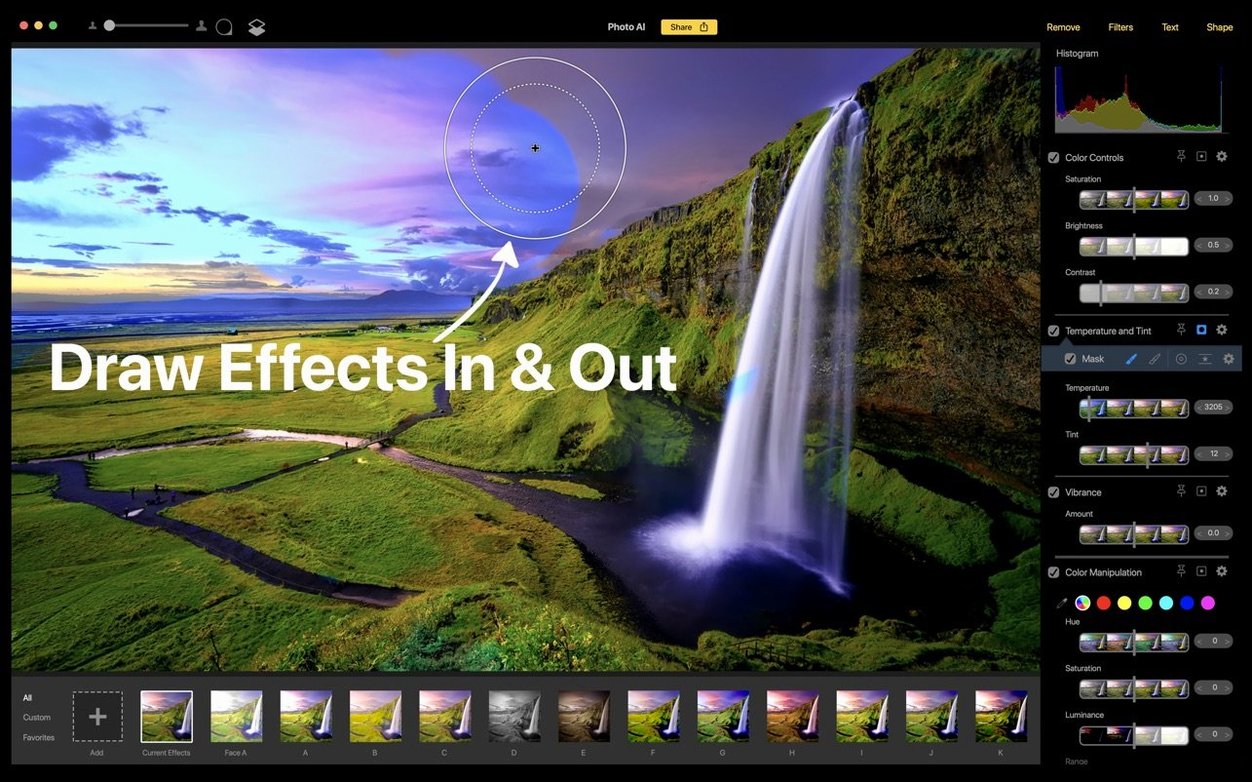
Masking the enhancement area. The brush tool in the masking panel is not just for excluding regions. Painting a rough mask over only the background lets you apply aggressive noise reduction there while leaving the subject at a lighter setting — useful when the subject is well-lit by flash but the ambient background is a noisy mess.
Intel Mac Overheating and Other Early Sticking Points
The app is straightforward, but a few points trip people up consistently enough to deserve a mention.
Intel Mac thermal throttling on long batches. Since this build runs on Intel 64-bit Macs, the GPU and CPU can heat up quickly when processing dozens of 45-megapixel files in a row. If you notice processing times doubling after the first ten images, the Mac is likely throttling. Work in smaller batches with a few minutes of idle time between them, or position the machine where airflow is not obstructed. A laptop on a duvet is the classic culprit.
TIFF bit-depth mismatches with Lightroom. If you export a 16-bit ProPhoto RGB TIFF from Lightroom, Photo AI reads it without issue. But when you save the enhanced version and re-import it, Lightroom may display a slight colour shift if its preferences are set to a different default colour space. Check that the export and import profiles match — sRGB for web output, Adobe RGB or ProPhoto for print — and the shift disappears.
Over-sharpening halos on high-contrast edges. The sharpening model sometimes adds a faint bright halo along edges where a dark building meets a bright sky. Reducing the sharpening strength slider below 50 is often enough, but if the halo remains visible at 100%, switch the sharpening model from Standard to Lens Blur in the dropdown. The Lens Blur variant handles edge transitions more conservatively.
Face recovery creating an uncanny look at high strength. The default face recovery strength is tuned for small, noisy faces where the model has little data to work with. When it detects a larger, well-lit face — say, a portrait at ISO 400 — the same default can over-smooth skin texture. Drop the strength to 20–30 for faces larger than about 300 pixels across, and the result stays natural.
Content-aware removal leaving smudges on textured backgrounds. The removal tool works well on skies, skin, and smooth surfaces, but it struggles with brick walls, foliage, or fabric where the texture has a clear repeating pattern. If the filled area looks smeared, try making the removal area slightly larger so the algorithm has more surrounding texture to sample from. A second pass with a smaller brush often cleans up the edges.
Salvaging a Candle-Lit Kiss Shot at ISO 12,800
Consider a wedding photographer who shot a December ceremony in a candle-lit chapel. The room was so dark that even at f/1.4 and 1/125 second, the auto-ISO landed at 12,800. The couple's first kiss happened at the far end of the aisle, so the usable portion of the frame — cropped to a vertical 4×5 — spans barely eight megapixels.
The photographer has already colour-corrected the raw file in Capture One and exported a 16-bit TIFF. At full screen, the noise looks like television static in the shadows, and the couple's faces are soft because the focus point was slightly in front of them — the autofocus system grabbed the edge of a pew in the heat of the moment.
Dropping the TIFF into Photo AI, they set the noise reduction model to Raw Denoise at about 60% strength. The luminance noise in the shadows collapses without smearing the lace detail on the bride's sleeve. Face recovery kicks in on both faces (detected at about 180 pixels across) and the default strength pulls the eyes and mouth back into focus just enough that the image no longer looks like a focusing error. They mask the couple and drop sharpening to 30% on the faces to keep skin texture, then push the background sharpening to 65% to bring out the stonework in the chapel walls.
The upscale panel is set to 2×, bringing the crop to roughly 16 megapixels — enough for a 12 × 8 inch print in the album. The whole adjustment takes about two minutes, and the processing finishes while the photographer queues the next image from the same sequence. The client never knows the original file was a noisy, slightly back-focused crop; they see a clean image of the moment they kissed.
Cranking All Three Sliders to Full and Other Over-Processing Traps
New users tend to approach Photo AI as a one-click fix and skip the controls that make the difference between a salvageable image and an over-processed one. A few patterns show up repeatedly.
Applying all three tools at maximum strength on every image. The app lets you enable noise reduction, sharpening, and upscaling simultaneously, and a beginner often cranks all three sliders to 80 or higher because the preview updates in real time and the initial results look impressive at a zoomed-out view. At 100%, the image usually shows sharpening halos layered on top of noise reduction smoothing, with faces that look like porcelain dolls. Better practice: start with only one tool at its default strength, check the result at 100% magnification, and then add a second tool only if the image genuinely needs it.
Ignoring the auto-pilot suggestions entirely. The opposite mistake. The app analyses each image and suggests a starting point for each tool, visible as small dots on the sliders. Dismissing those suggestions and setting everything manually from scratch wastes time, especially on a batch where the shooting conditions are consistent. Use the auto suggestion as a baseline and tweak from there — the recommendations are usually within 10–15 points of a sensible value.
Exporting at a lower bit depth than the source file. A beginner working with a 16-bit TIFF might save the result as an 8-bit JPEG because that is the default they use for web delivery. The enhanced file gets flattened to 8 bits per channel, and if they later decide to print it or adjust the exposure further in another editor, the latitude is gone. Save a 16-bit TIFF as your master enhanced file; export a JPEG from that if you need a web version.
Judging noise reduction on a scaled-down preview. The app's default preview zoom is often set to Fit, which downsamples the image to fit the window. Noise that looks completely gone at 30% zoom can still be visible in a print at 300 dpi. Always check noise reduction and sharpening at 100% or 200% before committing to the settings, especially on high-ISO files where chroma noise hides in the downsampled view.
- App line — version 2.1 of the consolidated Topaz Photo app, carrying the legacy Photo AI models plus newer ones
- macOS 11 (Big Sur) or later
- Intel 64‑bit processor
Questions on file
Does Topaz Photo AI support text and shape overlays?
Yes, the application includes tools for adding text and shapes, which sit alongside the AI enhancement and over 150 filter and effect controls.
What is the difference between the legacy Topaz Photo AI and the current Topaz Photo?
The legacy Photo AI reached its final release at version 4.0.4. The current Topaz Photo app includes all of those AI models plus additional new models in a single package.
Sign in · Create an account to add a field note.
No field notes yet. A measurement, a version, a machine — they appear after moderation.