Mac Apps
DriveDx 1.12.1
Mac AppsUpdated
| Requirement | On file |
|---|---|
| macOS | OS X 10.9 or later |
| CPU | Apple Silicon, Intel 64-bit |
| Download | 30 MB |
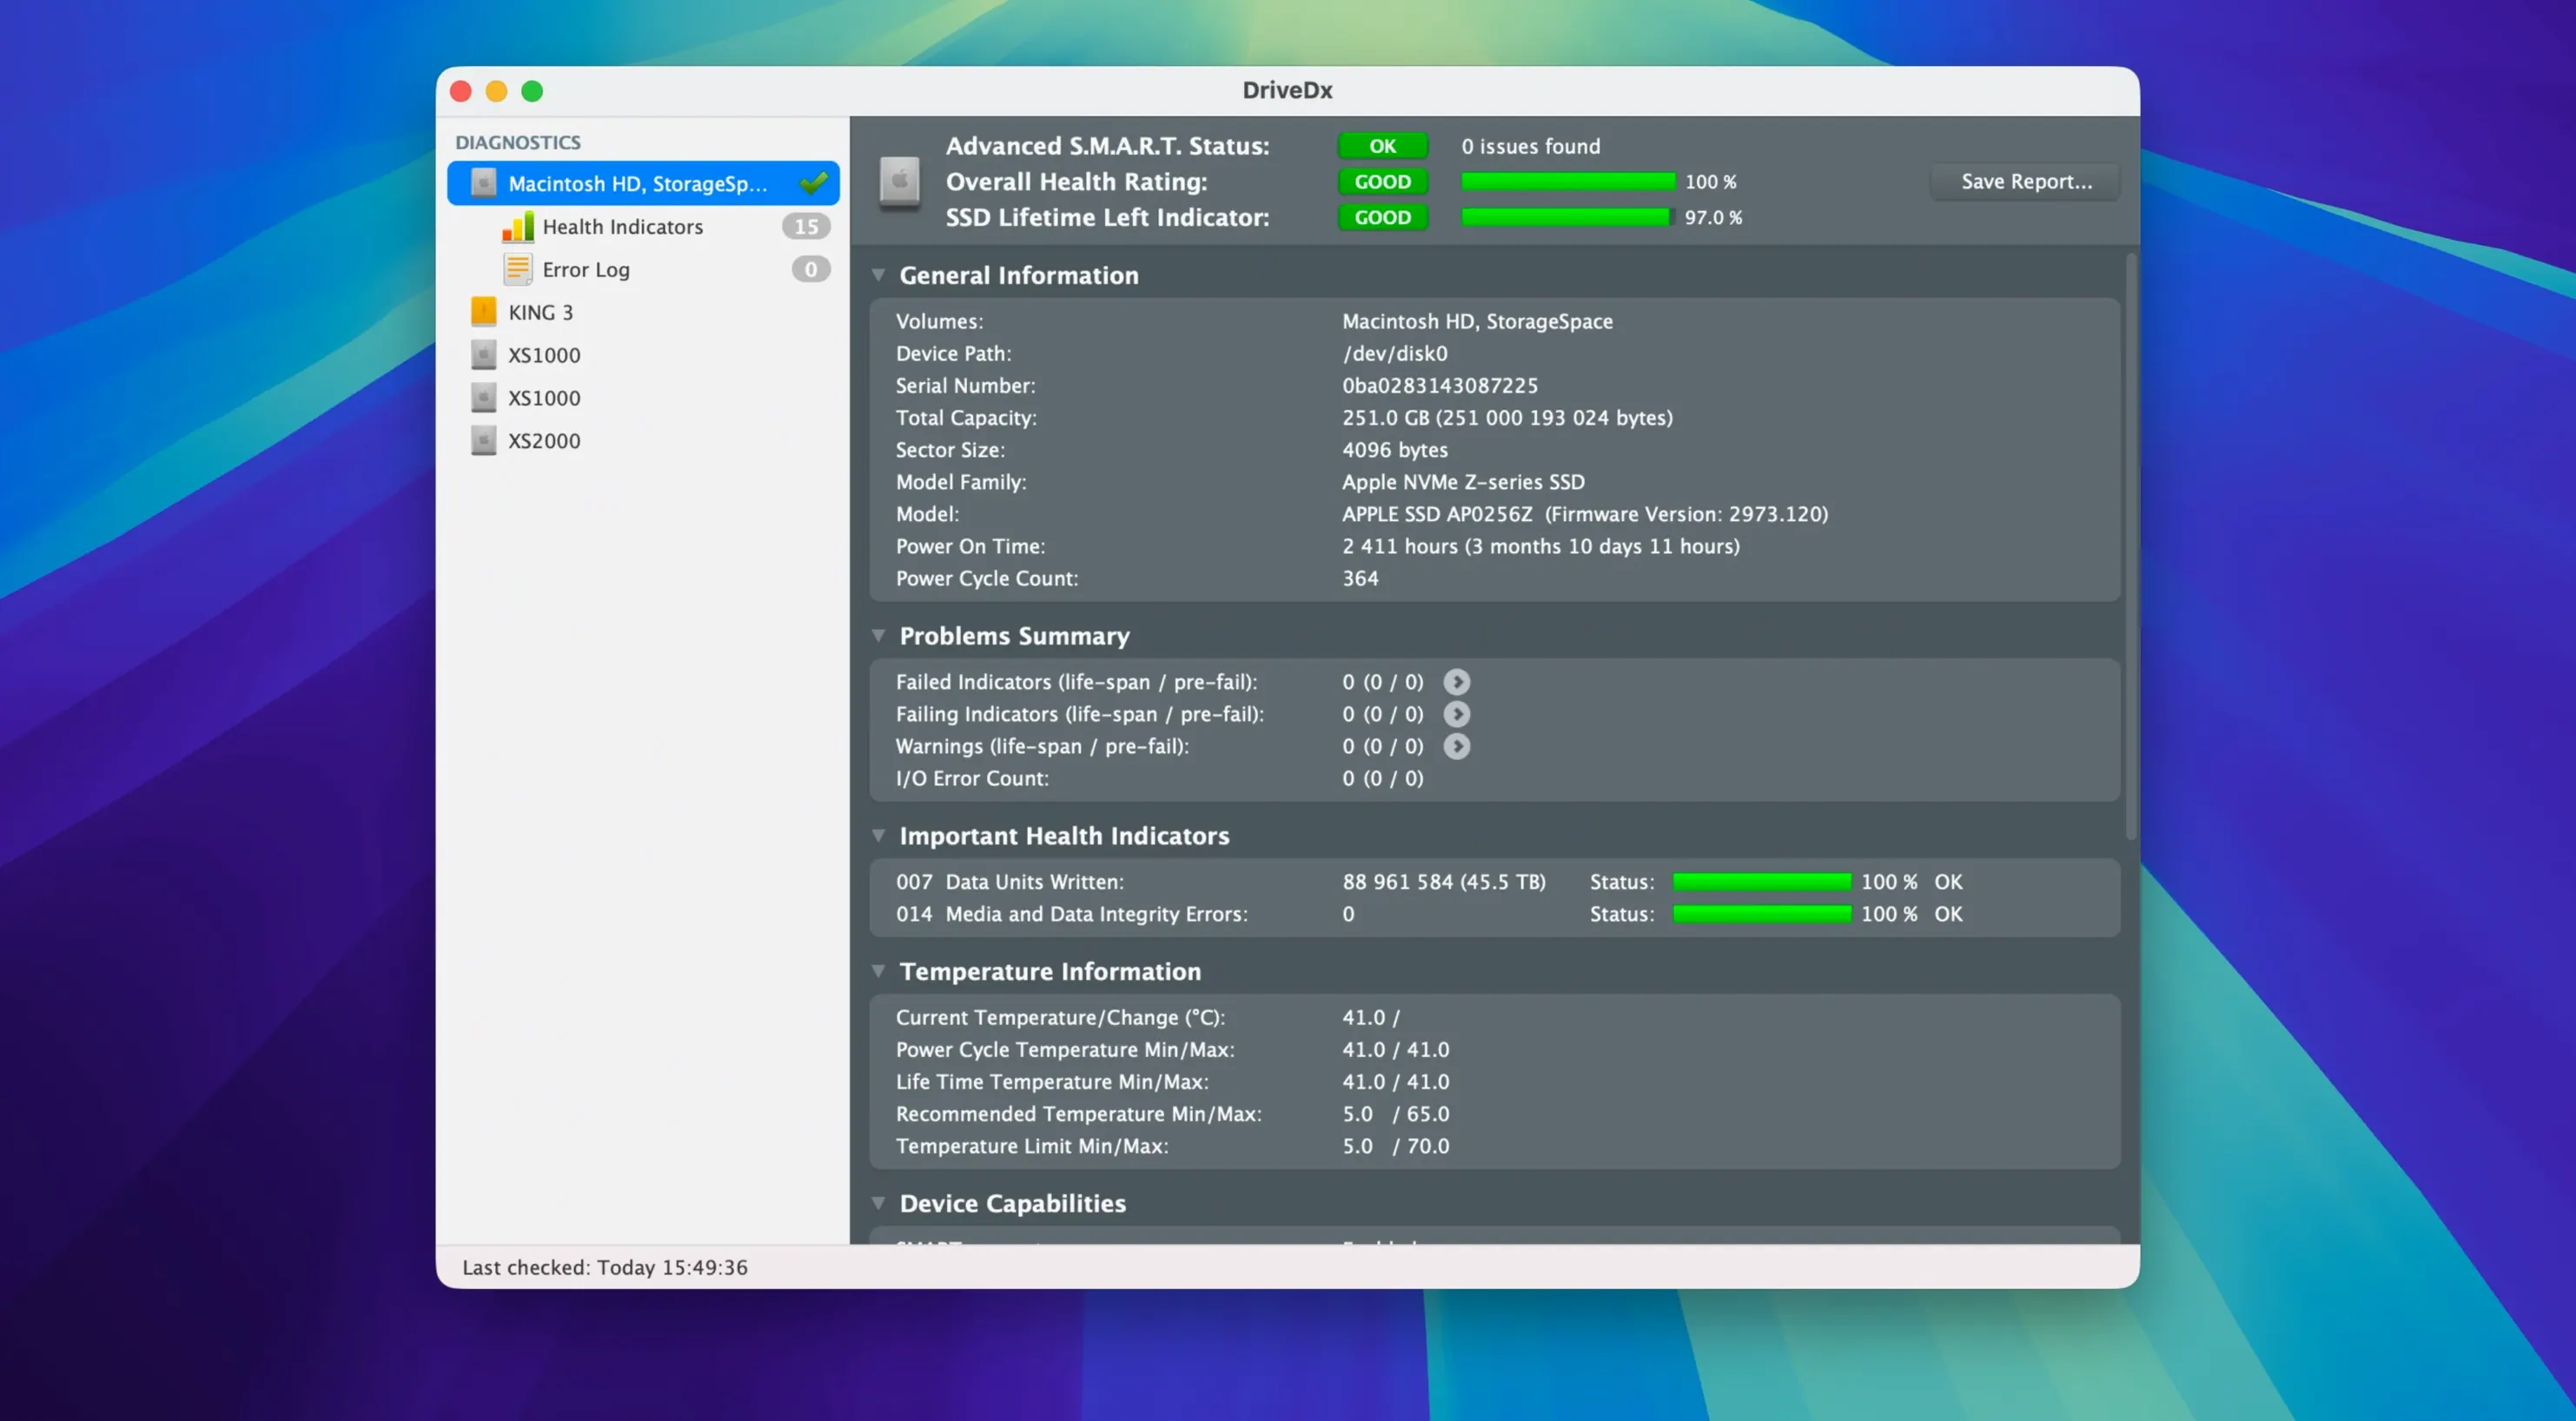
Where Disk Utility tells you a drive is fine right up until it isn’t, DriveDx fills the gap with continuous monitoring and intermediate health states. It reads the same SMART data your drive already records but interprets it into practical, early-warning diagnostics for both hard disk drives and solid-state drives.
- SMART status with nuance — DriveDx reports more than just OK or failed. It classifies drives into four health states: OK, Warning, Failing, and Failed, so you can act on a degrading device before it drops dead.
- Background monitoring — The app runs quietly in the background and pushes a notification the moment any attribute drifts into a problem zone. You do not need to remember to run a manual check.
- Drive-specific heuristics — The 1.12.1 release refines diagnostic algorithms and improves support for drives like the Patriot P200 SSD. The analysis is tuned per model, not a one-size-fits-all threshold.
- Native Apple Silicon driver — The driver installer no longer requires Rosetta 2. Everything loads cleanly on M-series Macs, with full readiness declared for macOS Sonoma.
DriveDx covers a gap Apple leaves open: the space between a healthy drive and a dead one. For anyone who has ever stared at a grey folder icon at boot, that early warning is the whole point.
Photographers with enclosures full of footage
A casual user who checks their Mac once a year probably won't feel the pull. DriveDx rewards people who live close to their storage — photographers with a mess of external enclosures, video editors shuttling terabytes between NVMe sleds, anyone managing a small fleet of Macs in an office without a dedicated IT room. For them, the jump from binary thinking (it works / it's dead) to a graduated warning system isn't a nice-to-have. It's how they schedule replacements before a deadline falls apart.
System administrators running a handful of Mac workstations will find the background monitoring cuts noise into signal. Instead of pulling SMART logs manually on ten machines, they get a notification when a specific attribute — reallocated sectors on an iMac, wear levelling count on a MacBook Air — crosses a threshold. The 1.12.1 update tightened those notification thresholds, so the app nudges earlier without crying wolf. Power users who live inside Activity Monitor and smartctl may also appreciate that DriveDx surfaces the same data without a terminal window, and it updates its heuristics per drive model, including newer drives like the Patriot P200.
Less obvious but just as real: people nursing older Macs. A 2013 MacBook Pro with a spinning disk is a ticking clock. DriveDx watches the pending bad sectors count and lets the owner know when to clone and walk away. It runs on macOS 10.9 Mavericks, so that old machine qualifies.
How DriveDx Fits Into a Mac Workflow
DriveDx does not replace Disk Utility — it precedes it. When a drive shows Warning in DriveDx, Disk Utility may still report it as healthy. First Aid will find nothing. That's not a contradiction; it's a difference in thresholds. DriveDx flags trends that Apple's tools ignore until the drive fails a self-test. In practice, that means you check DriveDx first, and only open Disk Utility when you're ready to format or repartition a replacement.
For users who clone drives regularly, DriveDx pairs naturally with Carbon Copy Cloner or SuperDuper. A smart routine: glance at DriveDx's notification area icon before starting a clone. If the source drive is in Warning, schedule the clone now and flag the drive for replacement. The alternative — cloning a failing drive blindly and discovering corrupted files later — is exactly what the app is built to prevent.
It also plays well with Time Machine. A Time Machine backup drive that develops bad sectors is worse than no backup at all because it feels like coverage. DriveDx monitors external drives, including USB and Thunderbolt enclosures, so it catches that decaying backup disk before you need it. The background agent sits in the menu bar and pushes macOS notifications through Notification Center, so it fits the same attention model as battery warnings or calendar alerts — glance, decide, act.
Some users run DriveDx alongside iStat Menus or TG Pro for a broader hardware dashboard. Those tools report temperatures and fan speeds; DriveDx reports the health of the drive generating that heat. Together, they give a fuller picture of what's happening inside the case. And because the driver is now fully native on Apple Silicon, it won't drag Rosetta 2 into the boot chain on an M1, M2, or M3 Mac.
Lag copying a project folder — then opening DriveDx
Say you're a video editor with three external SSDs connected through a Thunderbolt dock. You notice a lag copying a project folder — just a half-second hesitation that you might have chalked up to the dock. Instead, you open DriveDx.
The main window lists all connected drives. Each row shows the drive name, its health state as a colour-coded bar (blue for OK, amber for Warning), and a health rating as a percentage. You click on the drive in question — a 2TB NVMe in an enclosure — and the detail pane fills with attributes. Most are green, but the Media Wearout Indicator sits at 82%, down from 87% the week before. The overall health rating is 79%, still OK, but the trend line is pointing down.
You run a short self-test from the Diagnostics menu. It completes in two minutes, clean. That rules out an obvious failure, but the wear trend is enough. You flag an order for a replacement drive, clone the project with Carbon Copy Cloner that evening, and keep the old one as a read-only archive until it drops. The whole check took under five minutes, and no data was lost.
Here's what the flow usually looks like across a working day:
- Morning — DriveDx's background agent notes no changes overnight. A glance at the menu bar icon confirms all drives are blue. No action needed.
- Midday — A notification pops up: an external HDD's Read Error Rate has increased. Health state flipped from OK to Warning. You note it and finish the current task.
- End of shift — You open DriveDx, run a full self-test on that drive, and read the attribute history. The error rate spiked today. You launch Disk Utility, unmount the drive, and decide to replace it before the next project lands on it.
Let the initial health rating settle for a few days
Install it and let it settle. On first launch, DriveDx scans every connected drive, which takes a few seconds per device. Do not interpret the initial health rating as static — it needs a few days of background monitoring to establish trend lines. A drive that reads 100% on day one might dip to 97% by day four as the heuristics absorb a normal operating range. That's not a failure; it's the algorithm tuning itself to your hardware.
For users who search out terms like "drivedx mac crack" or "drivedx torrent," a cracked version of a drive-monitoring tool gives you the deepest hardware access on your Mac through an untrusted binary while you focus on protecting your data. The same applies to "drivedx cracked" builds floating around — check that the driver installer is included and that the kext is a native Apple Silicon build so the app runs well. The 1.12.1 driver is clean, signed, and native; the alternative can work fine when the whole point of the app is to warn you before something goes wrong.
Practical setup for the first week:
- Enable background monitoring immediately. Open Preferences, check "Start DriveDx at login," and set the health check interval to every 60 minutes. Daily is too sparse for a drive that can degrade in hours.
- Configure notification thresholds. The 1.12.1 update adjusted defaults, but you may want to tweak them. If you run a RAID or a JBOD setup, set alerts to trigger on Warning, not just Failing. Waiting for a drive to hit Failing is waiting too long.
- Run a full self-test on every connected drive. One full test takes 10–30 minutes per drive, depending on size. Run them overnight on day one so you have a clean baseline for all attribute values.
- Check the attribute history pane weekly. A single bad sector count is a curiosity. A run of three over two weeks is a trend. The history graph makes that pattern visible in seconds.
- Test notifications. In Preferences, use the "Send test notification" button to confirm that macOS Notification Center delivers alerts without delay. If you use Focus modes, add DriveDx to the allowed list so a Warning alert breaks through during work hours.
- macOS readiness — Declared compatible with macOS Sonoma.
- Apple Silicon driver — Driver installer no longer depends on Rosetta 2.
- Diagnostic engine — Algorithms and heuristics refined for more accurate health assessment.
- SSD support — Improved handling for Patriot P200 SSDs.
- macOS 10.9 Mavericks or later
- Intel or Apple Silicon Mac
Sign in · Create an account to add a field note.
No field notes yet. A measurement, a version, a machine — they appear after moderation.