Mac Apps
SwitchResX 4.14.2
Mac AppsUpdated
| Requirement | On file |
|---|---|
| macOS | OS X 10.10 or later |
| CPU | Apple Silicon, Intel 64-bit |
| Download | 6 MB |
You plug a 4K monitor into your Mac, and macOS offers three resolution choices that all feel like a compromise. The display’s native spec sheet lists a 3360×1890 HiDPI mode that works perfectly in Windows, but System Settings pretends it doesn’t exist. You open SwitchResX to add it.
- Select the target display in the left-hand column.
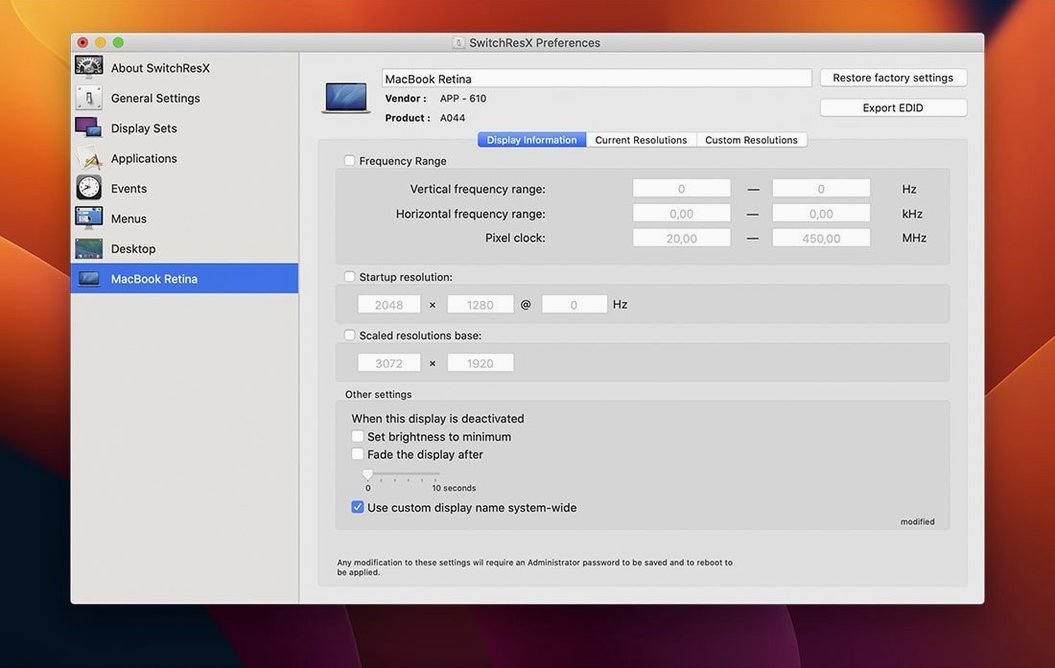
- Switch to the Custom Resolutions tab and click the plus button.
- Enter the horizontal and vertical pixel count — 3360 and 1890 — and set the scan rate to match your monitor’s spec.
- Save the entry, then enable it from the Current Resolutions list. The display refreshes and the new mode is active.
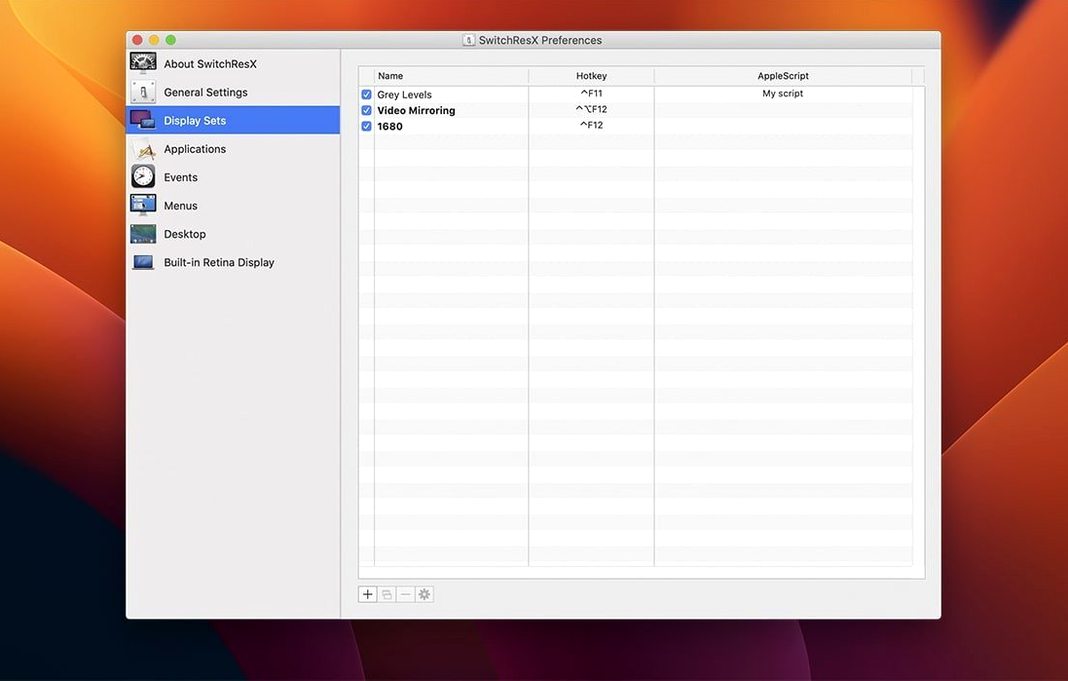
- Optionally, save the resolution and a colour profile together as a Display Set for one-click switching later.
SwitchResX fills a gap in macOS that power users, photographers, and anyone running non-standard monitor setups keep bumping into. It exposes every mode the display reports over its EDID, lets you define custom timings, and wraps the lot in AppleScript hooks for automated workflows. Retina scaling is fully supported — custom HiDPI resolutions appear in the menu bar just like the built-in ones. Version 4.14.2 tidies up edge cases: displays that show up nameless in macOS now identify correctly, deleting a Display Set that follows another no longer throws an error, and the settings daemon stops self-updating when no display is attached.
Workflow: Building a Resolution-Triggered Application Set
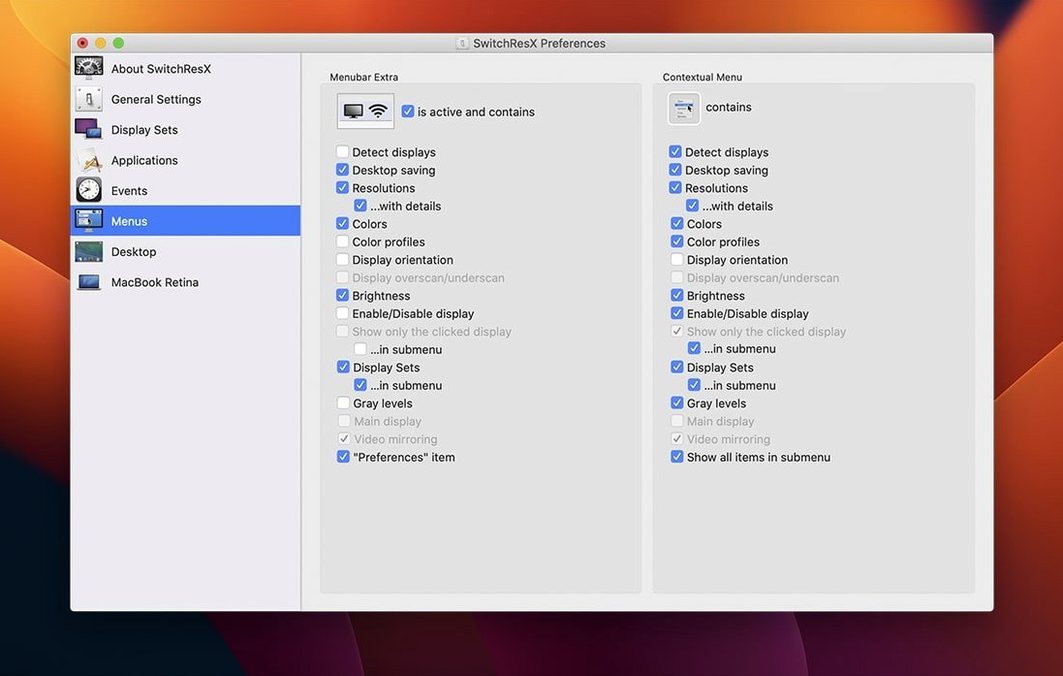
A common scenario: you connect a MacBook Air to a 27-inch 4K panel at a desk, then unplug it for a meeting. Each environment needs a different resolution, scaling factor, and colour profile — and you want specific apps to launch the moment the external display is detected. SwitchResX can do this with Display Sets and application triggers, no scripting required.
- Plug in the external monitor and open SwitchResX. Select it from the display list on the left.
- Set the resolution to 3008×1692 HiDPI (or whichever mode matches your scaling preference) and pick a calibrated colour profile from the Color tab — perhaps one with a warmer white point for indoor work.
- Open the Display Sets tab and click the plus button. Name the set something descriptive, like “Desk 4K Daylight.” Tick the boxes for resolution and colour; the current settings are captured automatically.
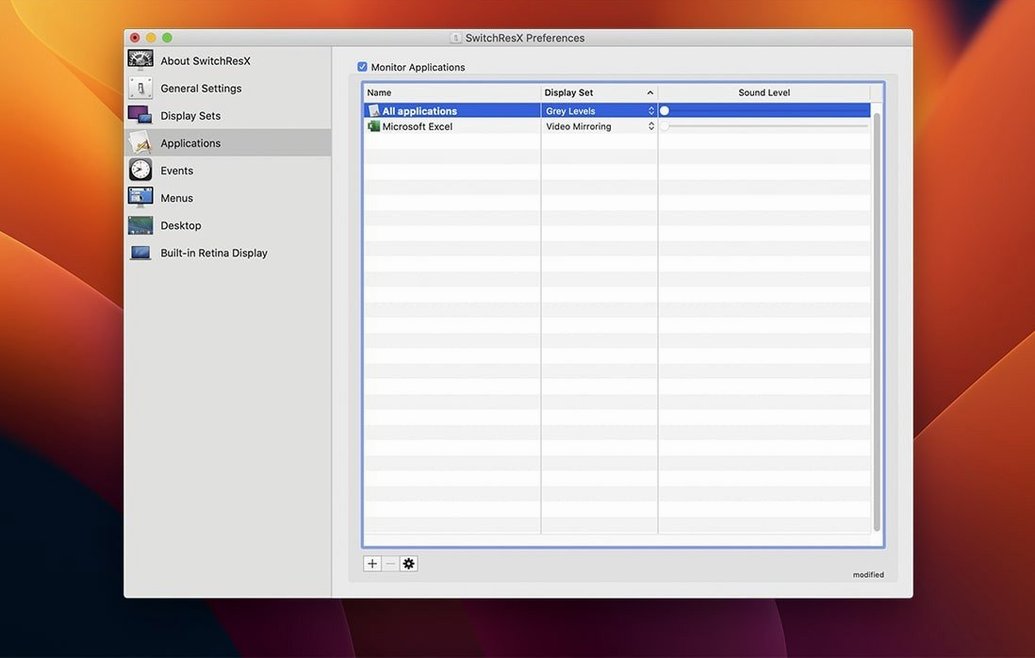
- Now switch to the Applications tab. Click the plus button, browse to an app you always use at the desk — say, DaVinci Resolve — and select it. A new entry appears in the list.
- Double-click the resolution column next to that application and choose “Desk 4K Daylight” from the dropdown. When Resolve launches, SwitchResX will apply that Display Set. Add Adobe Lightroom Classic the same way if you need a second app triggered.
- Unplug the external display. The MacBook snaps back to its built-in panel. Open the Applications tab again and set the default Display Set for the built-in screen — perhaps “Laptop sRGB” at 1680×1050 HiDPI — so it has its own baseline.
- Test the loop: launch Resolve. The external monitor should switch to the saved mode and colour profile within a second or two. Quit the app, and the display stays put — SwitchResX doesn’t revert on exit unless you configure a fallback in the Contextual menu preferences.
This setup removes the friction of manually adjusting scaling every time you dock. The triggers are application-based, so they fire reliably regardless of whether the display was already connected or hot-plugged mid-session.
Installing the Daemon and Preference Pane
The utility installs a preference pane and a background daemon. The daemon handles resolution switching and Display Set logic; the pane is where you configure everything. After mounting the disk image and running the installer, you will find SwitchResX in System Settings (or System Preferences, depending on your macOS version). Launch it once, and the menu bar icon appears — a small monitor glyph that gives quick access to current resolutions.
Three things worth doing on day one:
- Disable the menu bar icon if you don’t need it. The General tab in preferences has a checkbox. The icon is handy during setup, but if you’re relying on application triggers and Display Sets, it becomes visual noise.
- Lock your custom resolutions. After adding a custom mode, tick the Lock checkbox next to it in the Custom Resolutions list. macOS has a habit of discarding non-standard modes after system updates or display reconnections; locking tells SwitchResX to reinstate them automatically.
- Export your configuration. The File menu includes an export option. Save a backup of your custom resolutions and Display Sets. If you migrate to a new Mac or reinstall macOS, importing the file restores everything in one step — far quicker than re-entering pixel clocks and porch values.
Understanding the resolution list format helps too. Modes marked with a yellow warning triangle exceed the display’s reported EDID limits but may still work; those with a red cross are actively rejected by the GPU. If a custom HiDPI mode doesn’t appear, check that the base resolution (the non-HiDPI half) is enabled first — macOS derives HiDPI modes from those.
Silent Disk-Write Loop Finally Patched
Version 4.14.2 addressed three friction points that long-time users would recognise immediately. The settings daemon previously kept rewriting its own configuration when no external display was present — a silent disk-write loop that showed up in Activity Monitor as periodic I/O spikes. That behaviour is fixed.
Displays that macOS identifies with an empty name string — common with certain USB-C to HDMI adapters and KVM switches — now appear correctly in the SwitchResX interface instead of as a blank row. This matters because a nameless display couldn’t have a Display Set assigned to it; the fix restores full functionality for those edge-case setups.
Deleting a Display Set that was positioned after another in the list would sometimes cause the preceding set to lose its association with a display. The 4.14.2 update corrects the internal ordering logic so removal is clean. On Apple Silicon Macs, the update also allows the Dock process to quit when a display is disabled — relevant if you use SwitchResX to turn off a built-in laptop screen while driving only an external monitor in clamshell-adjacent modes.
For anyone who grabbed a switchresx download in the past and is running an older build, these fixes are the main reason to update. The core feature set — custom resolutions, Display Sets, application triggers, AppleScript support — has been stable for years. Recent releases are maintenance work, not feature drops.
A Session with SwitchResX: Docking at the Desk
08:42. You open the MacBook at a coworking desk and plug in a single USB-C cable that carries power, a 32-inch 4K display, and a hub. The monitor flickers once as macOS detects it and defaults to 1920×1080, which looks comically large on a 32-inch panel. The SwitchResX daemon notices the EDID handshake immediately.
You click the menu bar icon — you kept it visible for exactly this moment — and select the Display Set “Coworking 3008 HiDPI.” The screen blanks for half a second and returns at 3008×1692 HiDPI, the text sharp and UI elements sized correctly for the viewing distance. The colour profile shifts to a cooler 6500K preset you calibrated last month.
You launch Xcode. The application trigger you configured two weeks ago fires: SwitchResX checks that the correct Display Set is already active, finds it is, and does nothing — no unnecessary mode switches. You work for three hours, the resolution staying locked even after the display sleeps and wakes twice.
12:15. You unplug the cable. The MacBook’s internal panel takes over. The daemon reverts to the built-in display’s default set — 1680×1050 HiDPI — automatically, because you set it as the fallback in Display Sets preferences. No menu bar clicks, no System Settings visits. The session cost you one interaction.
- Display detection — Fixes repeated self-updating of settings when no display is attached and an issue where nameless displays appeared in macOS.
- Display Sets — Fixes an error when deleting a Display Set that was used after another Display Set.
- Apple Silicon — Allows the Dock to quit when disabling a display on Apple Silicon Macs.
- macOS 10.10 or later
- Intel and Apple Silicon Macs
Questions on file
Can SwitchResX create resolutions higher than my monitor's native spec?
The utility can define any custom resolution, but the final output depends on what the display's EDID reports and what the GPU can drive — it does not bypass hardware limits.
Does SwitchResX work with Retina displays?
Yes, it fully supports Retina and HiDPI modes, including custom HiDPI resolutions that appear in the menu bar alongside system-defined options.
Can I automate display switching with SwitchResX?
Yes, the application is compatible with AppleScript, so you can script resolution changes and Display Set activation for automated workflows.
Sign in · Create an account to add a field note.
No field notes yet. A measurement, a version, a machine — they appear after moderation.