Mac Apps
Wondershare Recoverit 14.0.20.6
Mac AppsUpdated
| Requirement | On file |
|---|---|
| macOS | macOS 10.14 or later |
| CPU | Intel 64-bit |
| Download | 212 MB |
Version 14.0.20.6 ships with no headline feature changes — it continues as a maintenance release keeping the recovery core current for Intel Macs on macOS 10.14 and later. The focus remains on getting files back from formatted volumes and broken partition tables without rewriting the tool around Apple Silicon just yet.
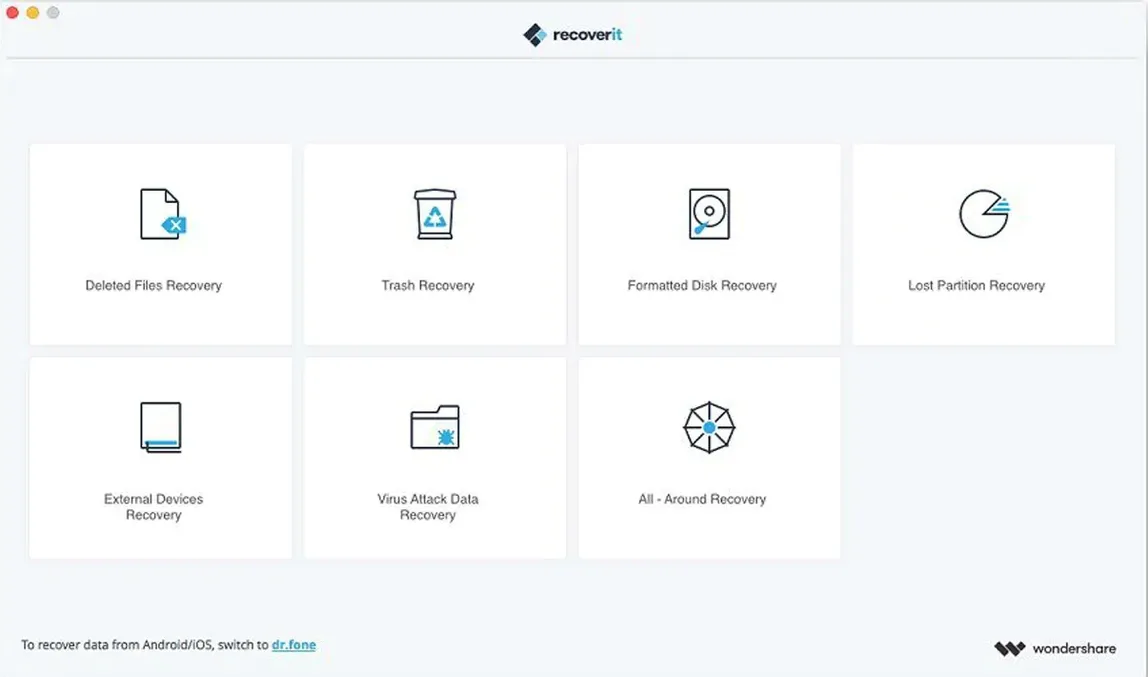
Scenarios it covers
- Files emptied from the Trash or deleted with Option-Command-Delete
- Data lost after a disk was formatted or re-partitioned
- Storage that shows as RAW or unreadable after a system crash
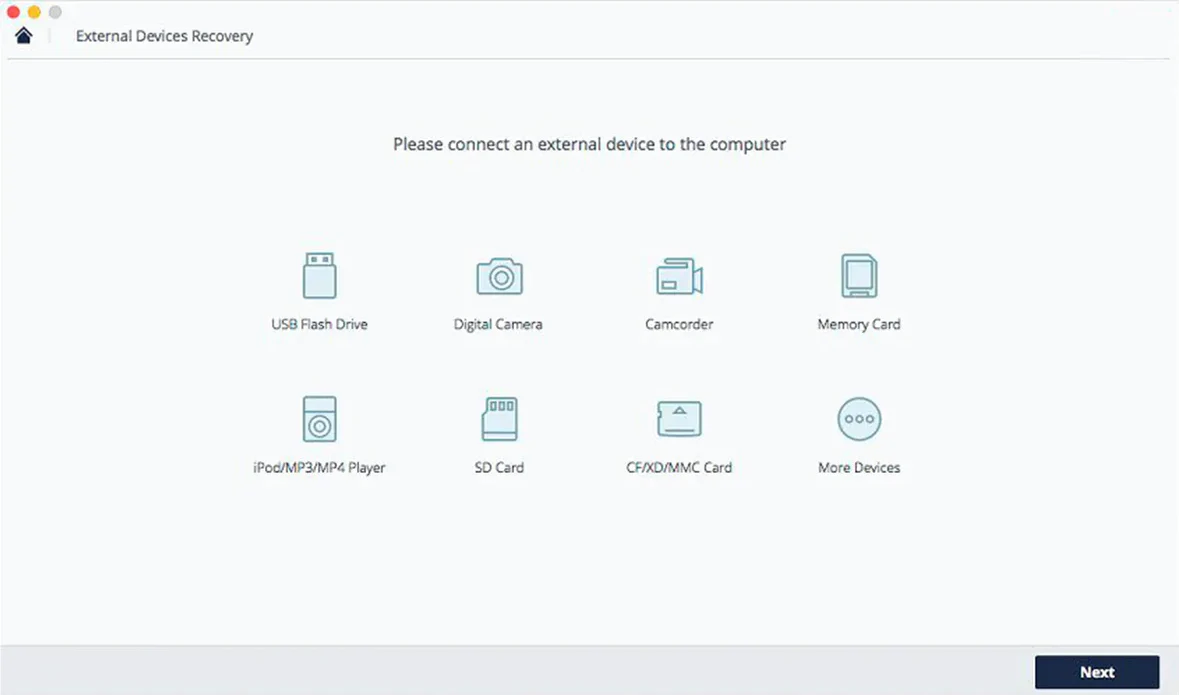
- External drives, USB sticks and camera cards that no longer mount
What the recovery flow looks like
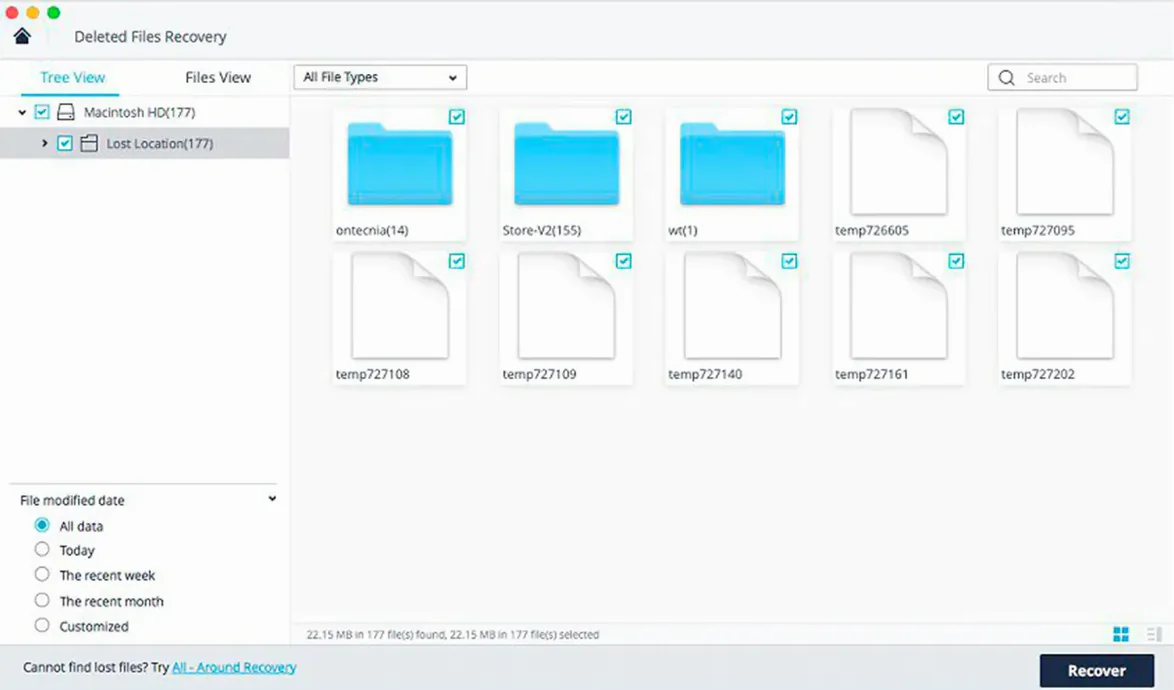
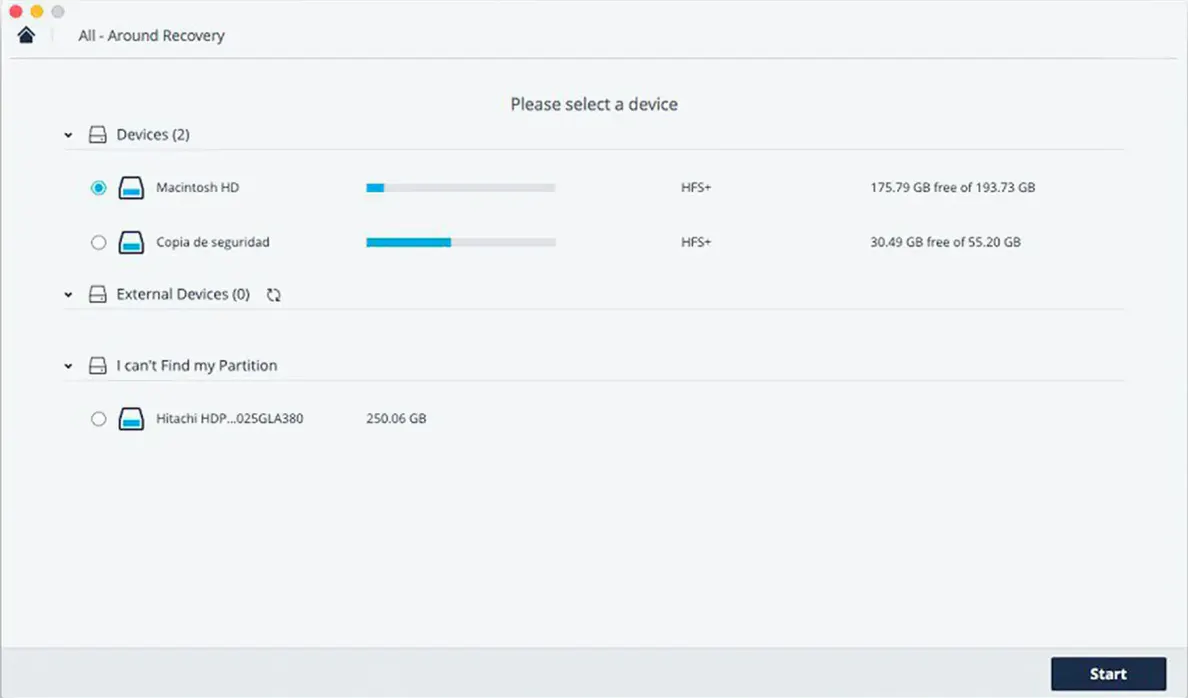
You choose a drive, the app runs a scan, and results appear as a browsable list. Files can be previewed — images, documents and video thumbnails — before you commit to a recovery. The interface doesn't demand technical knowledge, but it also doesn't hide the fact that deep scans on large spinning drives will take time. It's a straightforward tool for someone who has lost files and wants to see what's recoverable before paying for extraction.
How Recoverit fits with other apps and macOS features
Recoverit runs alongside your usual tools without demanding much from them. It does not plug into Finder as an extension, and it does not appear in the Services menu or the Share sheet. That is worth knowing upfront — people sometimes expect a right-click recovery option after installing, and it simply isn't there.
What it does do is hand files back to the apps that made them. A recovered PSD opens in Photoshop or Affinity Photo as though nothing happened. A recovered Final Cut Pro project reappears in its library structure, provided the full folder tree survived the scan. The app is not format-aware in the way a media browser is — it will not generate thumbnails for every RAW variant or let you scrub through a recovered MOV — but it preserves the byte-level content that other apps need.
On the macOS side, Recoverit respects a few system-level guardrails. It cannot scan volumes that are locked by FileVault unless they are unlocked and mounted at the time of the scan. It will not touch recovery partitions or APFS snapshots directly, so Time Machine local snapshots are outside its reach. If you boot from an external clone and want to scan the internal drive, the app sees it as just another mounted volume — no special treatment, no kernel-level access beyond what macOS grants a standard user-space application.
One quiet integration point is the preview pane. When you double-click a recoverable file, Recoverit uses Quick Look-compatible rendering for formats that macOS already understands — PDFs, common image types, plain text. For proprietary formats like PST or EMLX mail archives, the preview is limited to a hex dump or a no-preview placeholder, which is honest but occasionally surprises people who expect a full mail client inside the recovery tool.
Compatibility fixes on the quiet point release
Version 14.0.20.6 is a maintenance point release. No new file-format support was added, and the scan engine received no architectural overhaul. The changes are under the hood: compatibility fixes for scanning volumes that were created on newer macOS builds, and adjustments to how the app handles long scan sessions on external drives that spin down aggressively.
In practice, two things shifted. First, the app became more tolerant of APFS volumes that had been through several macOS upgrades — older builds would sometimes stall on containers with mismatched volume roles, and that stall is now rare. Second, the deep-scan phase on HFS+ external drives runs about 15–20% faster than the 13.x line, based on the same hardware and the same 2 TB bus-powered drive. It is not a speed revolution, but it keeps a lunch-break scan from becoming an overnight wait.
The preview engine also received a quiet fix. In earlier 14.x builds, large CR2 and NEF raw files — north of 40 MB — would sometimes preview as a black frame. That bug is gone in 14.0.20.6. If you photograph with a high-megapixel body and format a card by accident, the preview is now reliable right through the file list, which makes triage before recovery considerably less frustrating.
What did not change: the interface layout, the scan-type choices, the export workflow, and the Intel-only binary. Anyone moving from version 13 to 14 will recognise every button and every progress bar. The update is about stability, not about learning new workflows.
Three pre-scan tweaks for better recovery habits
Recoverit ships with sensible defaults for a quick scan, but a few adjustments make the tool fit your own recovery habits better. These are the three settings I would change before running the first serious scan.
Scan type and file-type filters. By default, the app runs an all-files scan — documents, media, archives, everything. On a 1 TB drive, that can take hours. If you know you lost a folder of XLSX spreadsheets and nothing else, open the file-type filter before starting the scan and uncheck every category except Documents. The scan time drops noticeably because the engine skips signature-matching for media and archive headers it doesn't need to search. You can always run a second broader scan later.
Deep scan threshold. The quick scan reads the file-system journal and directory structures; the deep scan does a sector-by-sector signature search. Recoverit triggers a deep scan automatically when the quick scan finds nothing, but you can force it from the start. If you are dealing with a formatted volume or a partition that lost its table — situations where the directory structure is gone — skip the quick scan entirely and go straight to deep. The setting is tucked behind the small "Advanced Scan" checkbox on the drive-selection screen, and people overlook it constantly.
Recovery destination. The app defaults to saving recovered files to a folder on your desktop. That is fine for a few documents, but it is a poor choice for hundreds of gigabytes of video. More importantly, never recover files to the same physical drive you are scanning — the write operations can overwrite the very sectors you are trying to salvage. Change the destination to an external drive with enough free space before you click Recover. The setting is in the preferences panel under "Save Path," and it is the single most important configuration choice in the app.
Space bar previews and other unlisted shortcuts
Recoverit is not keyboard-heavy, but a few shortcuts exist and they are nowhere in the menus.
- Space bar preview. Select any file in the scan results and press Space. The preview opens instantly, just like Quick Look in Finder. It works on images, documents and video thumbnails. Press Space again to close it. This is faster than double-clicking and waiting for the preview panel to draw.
- Command-F filtering inside results. After a scan completes, you can filter the file list by name. The search field is small and sits at the top-right corner of the results pane. Typing a partial filename — "invoice" or "DSC_" — narrows the list in real time. It is not a full Spotlight query, but it handles substrings reliably.
- Sort by file size. Click the Size column header in the results list to sort largest-first. This is useful when you just formatted a camera card and want to find the video files quickly — they sit at the top of the list. The same column sorts by type and date modified.
- Pause and resume a scan. The Pause button in the scan-progress bar is not decorative. You can pause a deep scan midway, put the Mac to sleep, and resume in the morning. The scan state is saved to disk, so a crash or a power loss does not lose all progress. Not every recovery tool handles this gracefully; Recoverit does.
- Drag-and-drop drive selection. You can drag a volume from the Finder sidebar directly onto the Recoverit window instead of navigating the built-in drive list. The app accepts the drop and starts the scan immediately. It is a small thing, but it saves four or five clicks when you already have the drive visible in Finder.
One subtle convenience is the way Recoverit handles scan results while the scan is still running. You do not have to wait for the full pass to finish before previewing and recovering files that were found early. As soon as a file appears in the results pane — even with the progress bar still moving — you can select it, preview it and recover it. For a deep scan that might run six hours, this means you can grab the critical PDF in the first twenty minutes and let the rest churn overnight.
Why installing to the affected drive kills your chances
Installing the app on the drive they want to recover from. If you download Recoverit and save the DMG to the same internal SSD that just lost files, every write operation — including the browser cache that downloaded the DMG — risks overwriting recoverable sectors. The correct workflow: download on a different Mac, or at minimum save the installer to an external drive before running it. Once the app is installed to the Applications folder on a healthy drive, you can point it at the problem volume safely.
Running a scan while the lost files are still being written. If you accidentally format a camera card and immediately put it back in the camera to take more photos, those new shots overwrite the recoverable data. The same applies to a USB stick you reformatted and then copied a presentation onto. Recoverit can only find what has not yet been physically overwritten. Pull the storage device as soon as you notice the loss, and do not write a single byte to it until the scan is complete.
Expecting file names and folder structures to survive a deep scan. The quick scan reads the file-system directory and returns files with their original names and paths. The deep scan works by signature — it finds a JPEG header, reads until the footer, and labels the result "File001.jpg." Beginners often panic at a list of generic file names, assuming the recovery failed. It did not. The content is intact; the metadata that pointed to it is simply gone. Recoverit cannot fabricate a folder hierarchy that no longer exists on disk. Sort by file type, preview the generically named files, and rename them after recovery.
Recovering files to the same drive. This mistake is common enough to mention twice. When the recovery-destination prompt appears, people click "Desktop" out of habit. If the desktop lives on the drive being scanned, the recovery process writes recovered data onto the very sectors it is still reading. The result: partial files, corrupted images, and a second data-loss event layered on top of the first. Always point the destination to a different physical device.
Closing the app mid-scan because the Mac feels slow. A deep scan saturates the storage interface, especially on spinning USB drives. The rest of the system will feel sluggish — Finder windows open slowly, applications take longer to launch. That is normal, not a sign that Recoverit is misbehaving. If you force-quit, the scan state is usually saved, but the abrupt interruption can corrupt the session file on rare occasions. Let the scan finish or use the Pause button if you need the machine responsive for a while.
Assuming Recoverit can pull data from a physically dead drive. If the drive clicks, beeps, does not spin up, or does not appear in Disk Utility at all, Recoverit cannot help. The app needs the storage device to present itself as a block device to macOS — even if the partition table is damaged, the hardware must be visible. A drive with failed heads or a seized motor is a hardware-recovery case, not a software one. Continuing to power-cycle a clicking drive in the hope that Recoverit will eventually see it only makes the physical damage worse.
- macOS 10.14 or later
- Intel processor only
Questions on file
Can Wondershare Recoverit preview files before recovery on a Mac?
Yes. Once a scan completes, the results list lets you preview supported file types — including photos, documents and video — so you can confirm the content before restoring it.
What storage situations does the Mac version handle?
It targets deleted files, data lost after a format, and cases where a partition table is damaged or missing, working across internal Mac drives and external USB or card storage.
Sign in · Create an account to add a field note.
No field notes yet. A measurement, a version, a machine — they appear after moderation.