Audio
Bitwig Studio 6.1
AudioUpdated
| Requirement | On file |
|---|---|
| macOS | macOS 12 or later |
| CPU | Apple Silicon, Intel 64-bit |
| Download | 592 MB |
Bitwig Studio is a digital audio workstation designed for electronic music composition, recording, editing and performance. Version 6.1 tightens its sampler and detection tools while keeping the modular workspace that first set it apart. The spec sheet tells you what you need to run it before you look at what you get.
Compatibility and what you need
Bitwig Studio 6.1 requires macOS 12 Monterey or later. It runs natively on both Intel processors and Apple Silicon chips. Install size varies with the sound content you include, but the architecture support is clean: one installer for both chip families, no Rosetta translation needed on M-series machines. The interface comes in English. MIDI controller support reaches devices such as ROLI Seaboard and LinnStrument, so MPE hardware integrates directly.
Workspaces and nondestructive clip editing
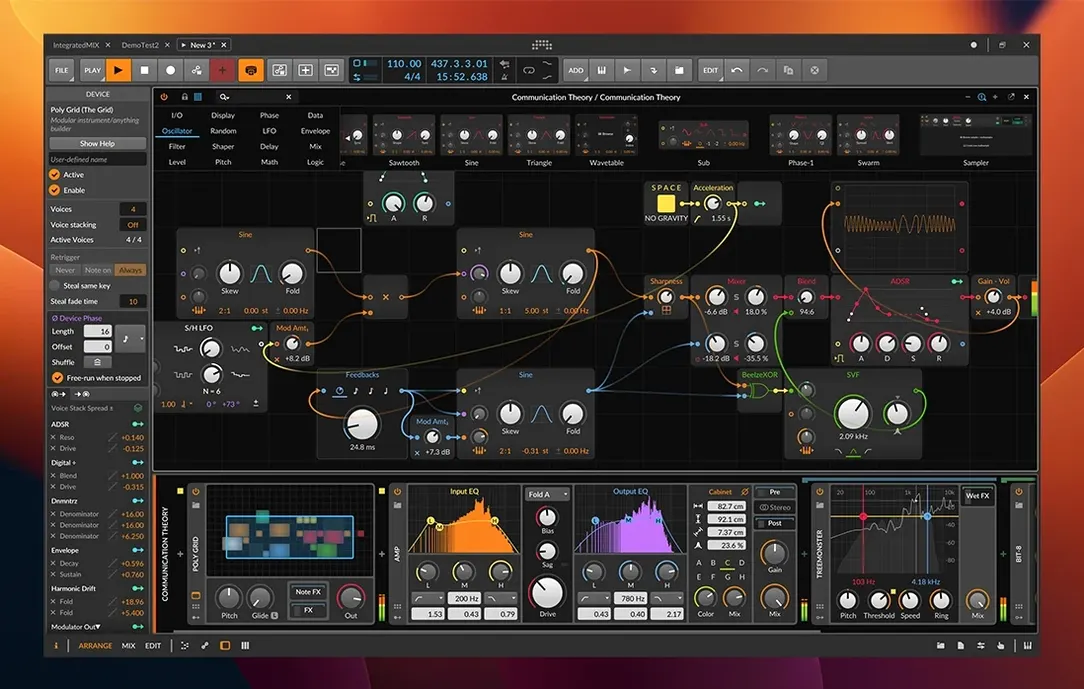
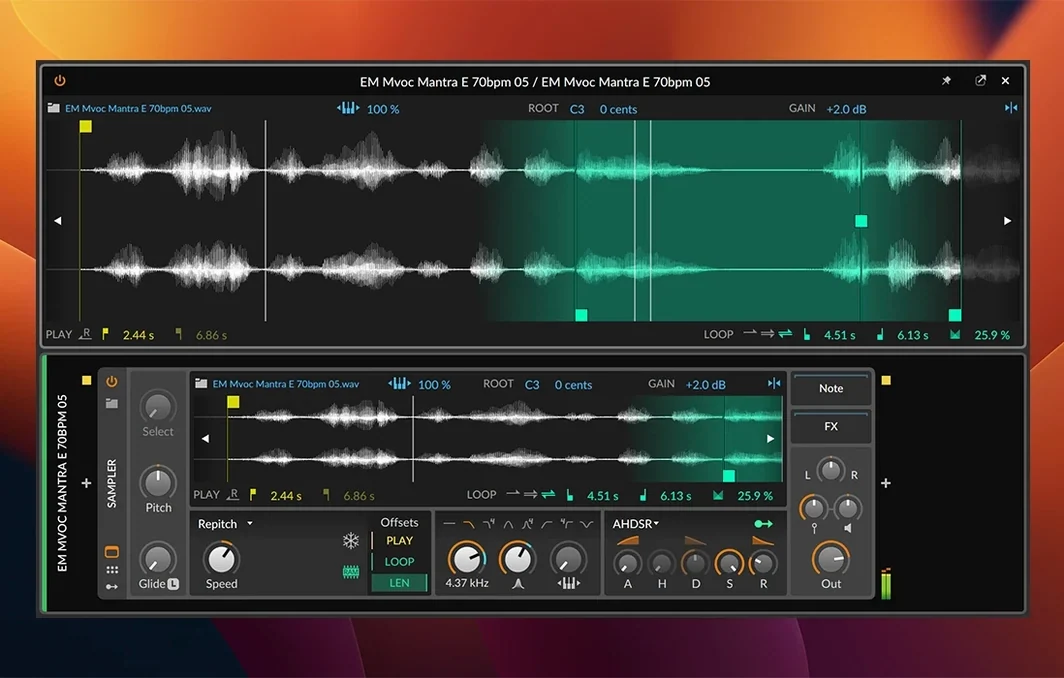
The application splits across three main workspaces — Arrange, Mix, and Edit — which you can spread across separate monitors. A Detail Editor handles nondestructive editing of individual clips, and you can record and edit Velocity, Gain, Pan, Timbre, and Pressure for each note. The 6.1 update brings a radically reworked Sampler with slicing, Spectral and Fragments play modes, plus automatic tempo and pitch detection. A large set of built-in devices and effects ships with the install. The interface is customisable, and MPE support sits at the core rather than as an afterthought, matching the software's focus on electronic music creation and live performance.
How Bitwig Studio connects to other software and macOS
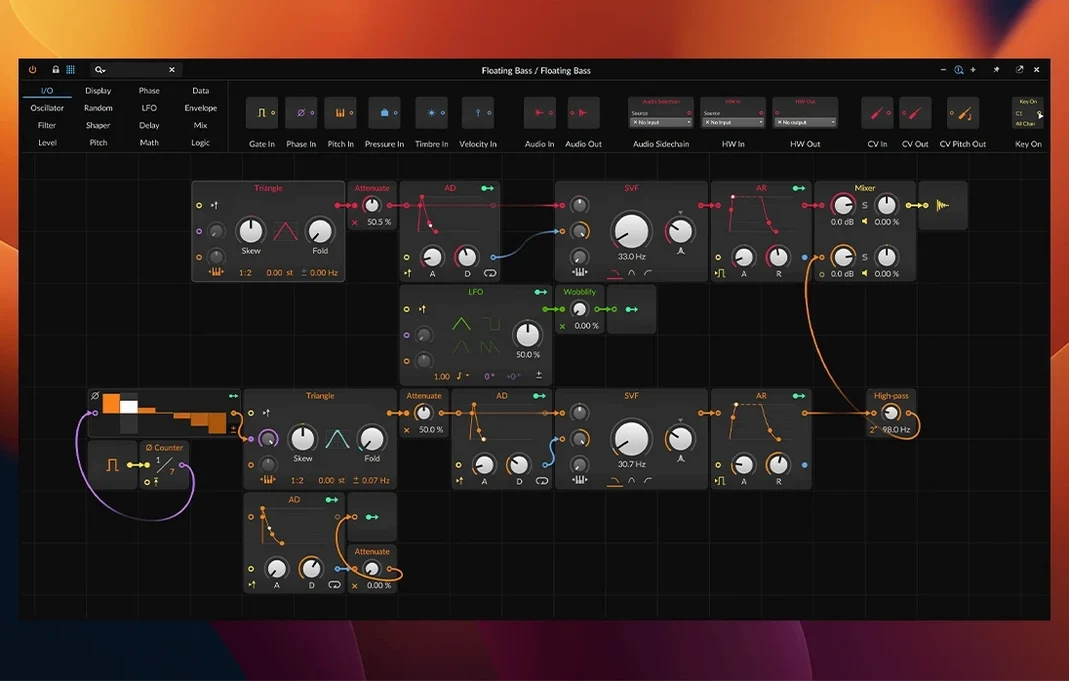
Bitwig Studio communicates with the outside world through a few well-chosen protocols. It sends and receives MIDI notes and timing signals, so hardware synths and drum machines slot in without extra translation layers. Sync support and Ableton Link keep tempo locked across devices on the same network — useful when a second laptop runs a drum sequencer or a tablet handles effects. The built-in plugins output CV/Gate and Clock signals for modular Eurorack gear when your audio interface has DC-coupled outputs.
On macOS, the app uses Core Audio directly. No aggregate device trickery is required for multi-channel interfaces, and the audio engine respects sample rate changes from Audio MIDI Setup without restarts. Multi-monitor support works through native macOS Spaces: you can place the Mix workspace on a secondary display and keep the Arrange view on the MacBook screen. Drag and drop from Finder imports samples into the Sampler or the Arranger timeline. The software also reads standard plugin formats — VST3 and CLAP — so effects and instruments from other developers sit inside the Bitwig device chain the same way native devices do.
Set your buffer size for tracking or mixing
A few moves in the first hours save friction later. Start by mapping your primary audio interface in Settings > Audio and set the buffer size to 128 samples for tracking or 512 for mixing. The engine handles low latencies well on Apple Silicon, but a buffer of 256 samples is a safe middle ground for general work. Next, check Settings > Controllers — Bitwig auto-detects many MIDI devices, but you may need to add your controller manually if it arrives without a script. MPE devices like the ROLI Seaboard need the MPE checkbox ticked per controller slot.
Spend ten minutes with the Sampler in version 6.1. Drop a drum loop onto a track, right-click it, and choose Slice to Sampler. The automatic tempo detection reads the source file and maps slices to MIDI notes on a new track. The Spectral and Fragments play modes are worth testing early — Spectral stretches a sample across the frequency range and lets you isolate individual harmonics, while Fragments splits audio into tiny grains and re-sequences them. Both modes are destructive-on-purpose; save a copy of your original sample first.
Configure the browser panel to point at your sample library folders. Bitwig indexes them on launch, and the search field filters by name, format, and length. Tagging samples with the built-in category system makes the browser useful rather than a file tree with a search bar.
A sound designer's autumn afternoon
Consider a sound designer working on a short film score. She has a folder of field recordings — rain on a tin roof, footsteps on gravel, a tram passing — and needs to turn them into a tense, shifting drone for a scene set in an abandoned warehouse. She drags the rain recording into a new audio track, opens the Sampler, and switches the play mode to Spectral. The waveform dissolves into a frequency map. She isolates the low-mid band, around 300 Hz, and raises its gain while muting the higher bands. The rain loses its hiss and becomes a rumble.
She adds a second layer from the tram recording, this time using the Fragments mode with grain size set to 60 ms and playback direction set to random. The tram's clatter becomes a metallic wash. Both samplers feed into a chain of built-in devices: an EQ-5 to carve out mud, a Delay-2 with a 16th-note dotted setting, and a Reverb with a 4.3-second decay. Modulation routing ties the reverb mix to a slow LFO, so the space breathes in and out. The whole setup runs inside a single project, and she records the output to a new audio track in real time, riding the gain of the Spectral layer with a MIDI knob mapped to the band volume. The result is a 90-second texture that shifts without repeating — exactly what the scene needed.
Workflow: building a sliced beat from scratch
This walkthrough turns a found drum break into a playable, rearranged beat using the new Sampler tools in Bitwig Studio 6.1. It assumes you have an audio file of a drum break — something with kicks, snares and hi-hats — and a MIDI controller or the computer keyboard for note input.
1. Import and detect tempo. Drag the drum break from the browser or Finder into an empty Arrange clip slot. Bitwig places it on a new audio track. Right-click the clip and select Detect Tempo. The software analyses the transients and sets the project tempo to match. If the detection is slightly off — it happens with breaks that have swing — tap the tempo manually in the transport bar while the clip plays, then choose Set Tempo from Tap.
2. Slice to Sampler. Right-click the clip and choose Slice to Sampler. A dialog asks for the slice sensitivity; start with 60% and adjust after you see the result. Bitwig creates a new track with a Sampler instance loaded, each slice mapped to a separate MIDI note starting from C1. The original audio track stays in the project, muted.
3. Clean up the slices. Open the Sampler's Slice editor. Some slices may catch two drum hits or a bit of silence. Drag the slice markers to fix them, or delete a slice entirely if the break had a sound you do not want. The Sensitivity slider in the Slice editor re-analyses the file and re-slices it on the fly, so you can push it up to 80% for denser breaks or drop it to 40% for sparse ones.
4. Program a new pattern. Create a MIDI clip on the Sampler track, double-click it to open the Detail Editor, and start placing notes. The piano roll labels show the drum sounds each slice contains. A kick sits at C1, a snare at D1, hi-hats scattered across E1 to G1. Draw in a pattern that differs from the original break — move the snare to the third beat, add double-time hi-hats, drop the kick on beat four. Enable the Pressure lane in the Detail Editor and add per-note pressure changes to vary the Sampler's filter cutoff, so hi-hat slices open and close organically.
5. Layer and process. Duplicate the Sampler track twice. On the first duplicate, use the Spectral play mode on just one slice — say, the kick — and tune it down 5 semitones for a sub-bass layer. On the second duplicate, apply the Fragments mode at a grain size of 40 ms to the hi-hat slices, pan the grains randomly left and right. Group all three tracks into a Drum Group and add a Compressor and a Bit-8 device (a built-in bit-crusher) on the group bus for grit. The finished beat is a heavily reworked version of the original break, playable and tweakable in real time.
- Sampler — radically updated with slicing, new Spectral and Fragments play modes
- Detection — automatic tempo and pitch detection added
- macOS 12 Monterey or later
- Intel or Apple Silicon Mac
Sign in · Create an account to add a field note.
No field notes yet. A measurement, a version, a machine — they appear after moderation.