Audio
SoundSource 6.1.5
AudioUpdated
| Requirement | On file |
|---|---|
| macOS | macOS 15 or later |
| CPU | Apple Silicon, Intel 64-bit |
| Download | 46 MB |
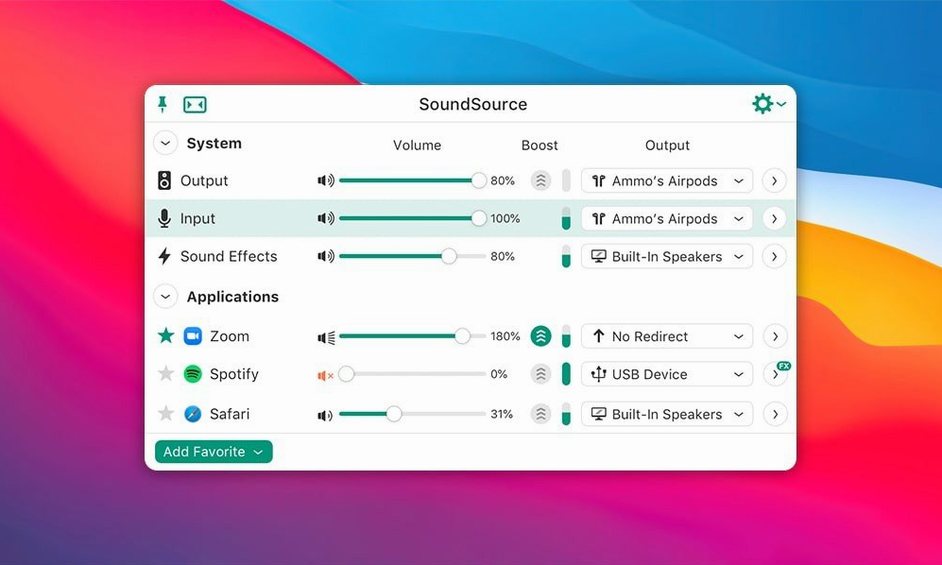
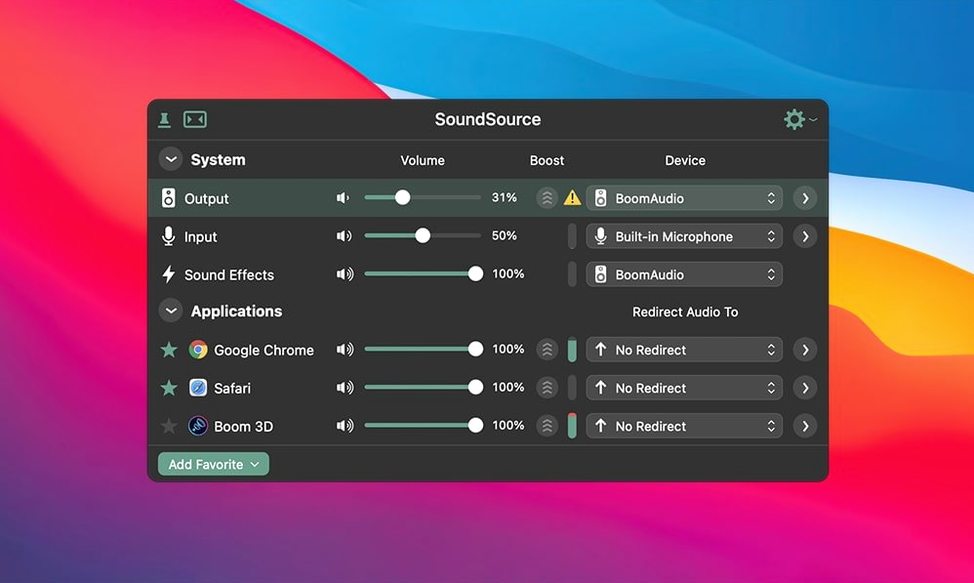
A utility that sits in your Mac's menu bar and hands you direct control over every sound source and output on the machine, right down to individual applications.
Set volume per application
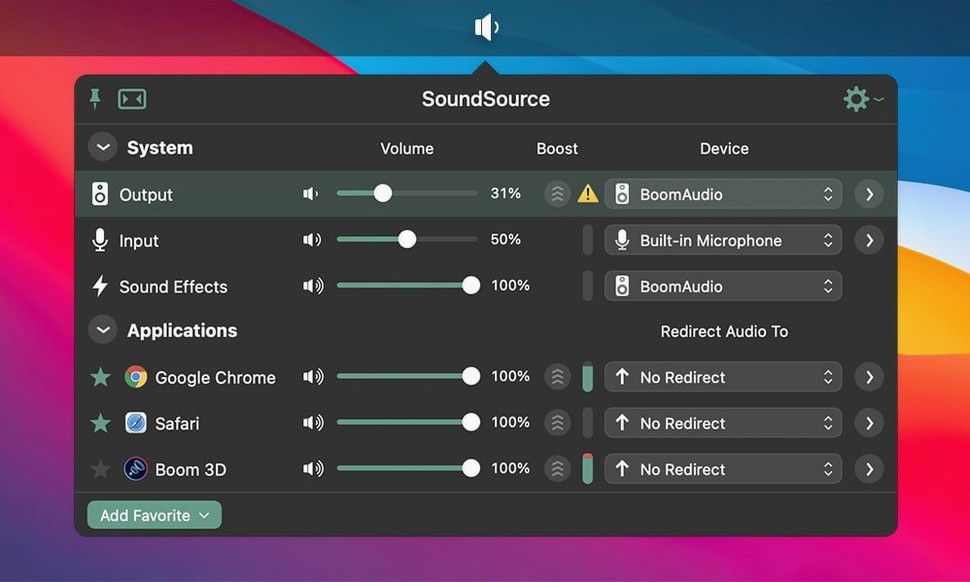
Adjust the level of your music app independently from your browser, or mute a chat client while keeping system alerts audible. SoundSource lists every app currently playing audio and gives each its own slider and output selector.
Route audio anywhere
Send one app to your headphones while the rest of the system plays through a desk speaker, or direct everything to an AirPlay device. The app remembers complete audio configurations and restores them with a single click.
Add effects to any source
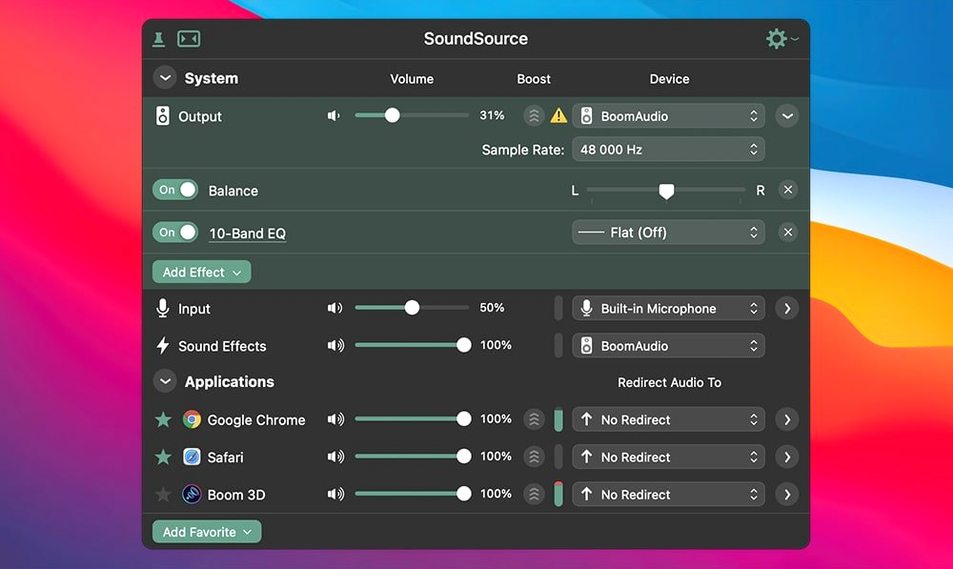
Apply built-in equalisation or third-party Audio Unit plugins to individual apps or the system output. A built-in equaliser and effects like Magic Boost are included, and the signal chain runs per-source without affecting other audio.
Per‑app routing vs. free auto‑pause utilities
SoundSource is not the only menu-bar audio utility, but the way it layers per-app routing, effects and system-wide device control sets it apart from simpler alternatives.
Against Background Music — Background Music is a free, open-source utility that auto-pauses one app when another plays audio, and offers per-app volume sliders. It does not support Audio Unit effects, cannot route audio to different physical outputs per app, and lacks the ability to save named configurations. Its menu bar widget is basic compared to SoundSource's compact full-control panel. For someone who only needs per-app volume, Background Music is a lightweight pick. SoundSource adds routing, effects, headphone EQ and output grouping in the same menu-bar footprint.
Against Audio Hijack — Audio Hijack (also from Rogue Amoeba) is a recording and processing tool built around a session graph. It can route, record and apply effects, but it is not a system output-switcher and does not live in the menu bar. SoundSource handles the everyday jobs — switching a mic, adjusting Spotify's level, sending a call to headphones — without opening a separate window. Many users run both: Audio Hijack for complex recording chains, SoundSource for quick daily control.
Against macOS sound settings alone — The built-in Sound pane in System Settings lets you pick one output and one input. That is it. No per-app volume, no output to two devices at once, no equaliser beyond the Music app's own EQ. SoundSource wraps all of that into a menu bar panel that needs two clicks instead of a trip through System Settings.
Pin the icon so it survives restarts
A few early adjustments make the app feel like it was always part of the system.
- Pin the menu bar icon. Drag SoundSource to a fixed spot in the menu bar (hold Command and drag) so the icon does not shift when Bluetooth devices connect and disconnect.
- Set a keyboard shortcut for the panel. In SoundSource's preferences, assign a global hotkey to open the main window. Many users pick something like Control-Option-S to avoid collisions with other apps.
- Name your devices. If your desk setup has "USB Audio DAC" and "USB Audio DAC (2)", rename them in Audio MIDI Setup on the Mac. SoundSource reads those names, and clear labels prevent routing mistakes.
- Build one Output Group early. If you often want audio from both the internal speakers and an AirPlay speaker, group them once and save it as "Kitchen + Desk". From then on, one click routes the system output to both.
- Check the "Launch at login" setting. SoundSource works best when it is always running. Enable the option in General preferences so it starts with every session.
- Try Magic Boost on quiet sources. The built-in Magic Boost effect lifts low-level audio without pushing peaks into distortion. Apply it to a quiet YouTube video or a low-gain microphone input and notice the difference before building more complex effect chains.
A podcast editor's real-world setup
Consider a freelance podcast editor who works from a home office. They have a USB audio interface with a condenser mic connected, a pair of wired studio headphones, and a set of desktop monitors. Throughout the day they switch between recording voice-over in Reaper, listening to reference tracks in Apple Music, and attending client calls over Zoom.
With SoundSource, they create three named configurations:
- Recording: system input set to the USB interface, system output routed only to the wired headphones, Reaper set to use the interface input directly, and a compressor Audio Unit inserted on the headphone output to catch sudden loud peaks during playback.
- Calls: input still on the USB mic, output switched to an Output Group that sends audio to both the headphones and the desktop monitors at low volume, so they can hear the call clearly while stepping away from the desk. Zoom's output is routed to the headphones only, keeping call audio private.
- Music: input switched to "None" to avoid accidental mic passthrough, output set to the monitors only, and the built-in Headphone EQ applied to Apple Music with a slight low-end boost that matches those particular speakers.
Switching from recording to a client call is a single click on "Calls" in the configurations list. No plugging or unplugging, no trips to System Settings, no risk of feedback from the monitors during recording.
From wake to routed audio on a Tuesday morning
Imagine a Tuesday morning. The Mac wakes from sleep, and SoundSource loads automatically — the icon appears in the menu bar near the clock.
You click the icon. The panel drops down, showing the current output device at the top: "External Headphones". Below it, the input section reads "MacBook Pro Microphone". The active apps list shows three items: Safari, Music and Slack.
You are about to join a team stand-up call. First, you switch the input from the built-in mic to "Yeti Stereo Microphone" — two clicks, one on the input label, one on the device name. The change is instant. You then drag the Slack volume slider up to 80 % and set Safari to 30 %, keeping background music audible but low. For the call itself, you route Slack's output to the External Headphones while leaving Music playing quietly through the MacBook speakers, just enough to hear a new track you are evaluating.
During the call, a notification sound blares. You open the SoundSource panel again, click the "Sound Effects" section and drag its slider down to 15 %. The alert is now subtle instead of startling. After the call, you want to listen properly to the track that played in the background. You save the current state as "Stand-up call setup" using the Save Configuration option, then load a different config called "Music review" that switches the system output to the desktop monitors, mutes Slack, sets Music to full volume and applies a parametric EQ curve you tweaked the day before.
The whole sequence — call prep, volume adjustments, device switches, loading a saved config — happens without leaving the menu bar panel. No windows to manage, no preference panes to open. When you step away for lunch, you Option-click the SoundSource icon to mute all audio instantly. One more Option-click brings it back when you return.
SoundSource 6.1.5 brings a round of targeted corrections and stability adjustments from Rogue Amoeba.
- macOS 15 or later
- Apple Silicon or Intel 64‑bit processor
Sign in · Create an account to add a field note.
No field notes yet. A measurement, a version, a machine — they appear after moderation.