Design
SketchUp Pro 26.2.242
DesignUpdated
| Requirement | On file |
|---|---|
| macOS | macOS 13 or later |
| CPU | Apple Silicon, Intel 64-bit |
| Download | 1.6 GB |
Before you launch the app, check whether your Mac is ready for the current 26.2.242 build.
Which macOS versions are supported?
The installer requires macOS 13 Ventura or later. Tested versions run from 13 Ventura through 26 Tahoe.
ARM and x86 slices ship in one binary
Yes. The package carries both ARM and 64-bit x86 slices, so M-series and Intel Macs run the code without Rosetta translation.
8 GB RAM minimum, discrete GPU keeps orbit smooth
Plan for at least 8 GB of RAM and 6 GB of free hard-disk space. Integrated graphics will work, but a discrete GPU keeps viewport navigation fluid on heavier models.
LayOut and flythrough animations in the same Pro bundle
LayOut ships in the same bundle for plans, elevations, title blocks, and vector presentation boards. The animation tools can also generate walkthroughs and flythroughs directly from your scene tabs.
Closed loops and groups stop geometry from sticking together
New users often treat SketchUp like a freeform sculpting app. It is not. The engine wants closed loops, coplanar faces, and sensible group hierarchies. Ignore those rules for ten minutes and you will spend an hour unpicking sticky geometry.
Drawing on the wrong axis
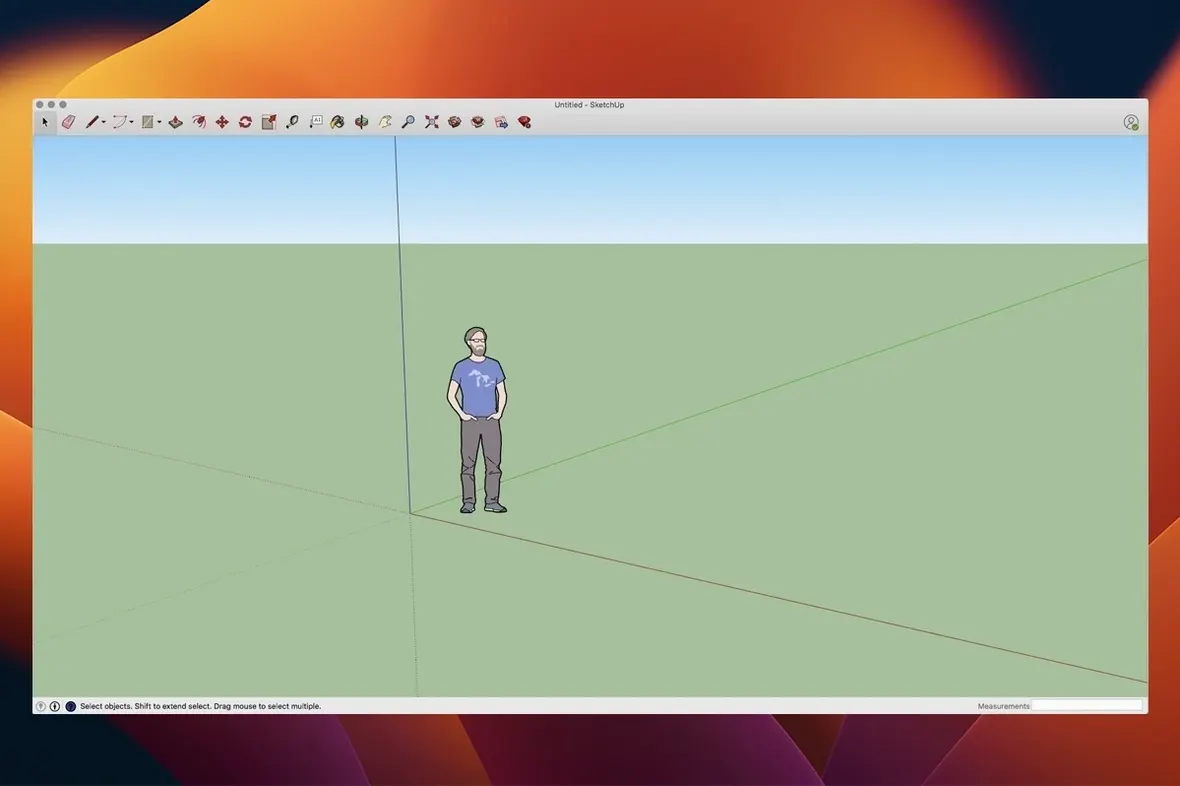
The coloured inference lines are not decorative. Beginners frequently sketch a floor plan on the blue axis because they nudged the mouse mid-stroke, then wonder why walls extrude sideways. Tap an arrow key (Left for green, Right for red, Up/Down for blue) to lock the axis before the first click. If the line is already drawn, select it and check Entity Info — the length field will usually confirm the mistake with a Z value you did not intend.
Painting raw faces instead of groups
Applying materials directly to loose geometry works until you need to move a wall or swap a finish. Paint a group or component envelope, not the raw face. The material sticks to the container, and editing the contents later does not strip it. Beginners who skip this step often end up with a model where every third face is unpainted after a push-pull operation.
Ignoring component instances
Copying the same chair twenty times as loose geometry bloats the file. Make the first chair a component, then duplicate the instance. Edit one and all twenty update. The Outliner panel will expose whether you have been copying groups instead of components — a twenty-minute fix in a kitchen model with forty-two identical cabinet pulls.
Forgetting to purge unused stuff
A model accumulates materials, styles, and component definitions with every import and experiment. Window > Model Info > Statistics > Purge Unused clears them. A file that ballooned to 180 MB after dragging in six furniture models can drop to 22 MB just by purging the orphaned definitions those imports brought along.
Modelling at the wrong scale
SketchUp works in real-world units. If you model a room at millimetre scale but the template expects metres, the Tape Measure tool will give you numbers that are off by a factor of a thousand. Set the template via File > New from Template before the first line, not after. Fixing scale retroactively means scaling the entire model and hoping grouped geometry does not distort — it usually does.
Workflow: Modelling a Simple Cabin from Site Scan to Presentation
This walkthrough uses the 26.2.242 build on an M2 MacBook Pro with a reference photo and a rough site sketch. The aim is a model with a cutaway roof, interior furniture, and a LayOut sheet for a client meeting.
1. Import the site image. Drag the drone photo into an empty scene. Explode it, right-click, choose Make Group. Scale it with the Tape Measure tool: measure a known dimension on the photo — a 3-metre shipping container in the corner — and type 3m. Confirm to resize the entire model space. Lock the group so it stays put.
2. Trace the footprint. Lock the red-green plane with the Up arrow. Draw the perimeter with the Line tool, snapping to the photo edges. Close the loop and a face fills. Push-Pull up 2.7 metres to form the envelope. Triple-click the volume, Make Group, name it Shell.
3. Cut openings. Draw rectangles on the front face for a door and two windows. Push-Pull them through the wall thickness — 150 mm in this case. Hold Option while pushing to create the frame depth. Group each opening so trims can be added later without distorting the wall.
4. Structure the roof. Draw a triangle on the gable end in a separate group. Push-Pull across the cabin length, then intersect the shape with the Shell group. Use Solid Tools > Subtract to carve the interior space and leave a 300 mm overhang. The result is a watertight roof volume.
5. Furnish the interior. Import a bed and a stove from the 3D Warehouse. Place them into the cabin group so they move with the shell. Scale the stove component to 60 cm wide — the Entity Info panel confirms the dimension. Purge unused definitions after placing each item to keep the file under 50 MB.
6. Add scene tabs for LayOut exports. Create a Plan scene (top view, parallel projection), an Elevation scene (front, parallel), and a Perspective scene (45° angle, two-point perspective). Set shadow to match the site latitude — 54°N in this case — and set the time to 11:00 for crisp daylight.
7. Assemble the LayOut sheet. Open LayOut, start an A3 landscape document. Insert the three SketchUp scenes via File > Insert. Scale the plan to 1:50 with the SketchUp Model inspector. Add dimensions on the plan view using the Dimension tool — they snap to model edges and update when the model changes. Drop a title block from the scrapbook, type the client name, and export a PDF. Total time from blank scene to client-ready sheet: just under two hours.
Solid-group interference checks now run without a plugin
The 26.2.242 build introduced several workflow adjustments that affect everyday modelling, not just feature bulletins. The additions are practical rather than cosmetic.
Analysis Hub integration means you can now run interference checks on solid groups without an external plugin. Select two overlapping volumes in the kitchen model — a duct and a beam, say — and the Analysis Hub reports the clash volume and centroid. It is a single dialogue, not a full BIM clash matrix, but it catches the kind of clearance error that would otherwise surface on site.
Extensions migration is a one-time operation. If you carried extensions forward from SketchUp 2024 or earlier, the 2026.2 installer prompts a migration on first launch. The process copies extension files to the new user folder and disables any that lack Apple Silicon signatures. Most renderers and solid-tool add-ons migrate without issue; older Ruby scripts with unsigned C extensions will be flagged and left disabled. You can re-enable them manually in Extension Manager, but stability is not guaranteed.
LayOut graphics improvements are most visible on scaled viewports. Vector rendering of section cuts now produces sharper line weights, and a section fill that used to render as a blocky hatch in 2025 now displays smooth gradients. For presentation boards, this reduces the need to export to Illustrator just to clean up linework. The change is subtle on screen but apparent in a printed A1 sheet at 300 dpi.
Mac shortcut and UI fixes address a handful of annoyances. The Escape key now reliably deselects nested groups in the Outliner — a bug that lingered through two previous point releases. The Materials panel no longer resets the search field when you switch between the Paint Bucket and the sample swatch, which saves a few seconds every time you sample and apply a finish across multiple faces. On multi-monitor setups, dialogue windows remember their positions between sessions, so the Components tray no longer drifts back to the primary display after a restart.
Yes, LayOut is bundled—here are the pre-download answers
A few queries appear in every forum thread and user group before someone downloads the latest build. Here are the answers without the marketing padding.
Does LayOut come with it? Yes. LayOut is part of the SketchUp Pro bundle and installs alongside the modeller. You do not need a separate download or a different installer. When you install the 26.2.242 package, both apps appear in the Applications folder. LayOut is not a trial, not an add-on, and not a subscription extra — it is included in the same disk image.
Can it export to DWG? Yes. SketchUp Pro exports 2D DWG from LayOut and 3D DWG from the modeller. The exporter supports AutoCAD 2013 format and earlier, which covers every drafting workflow that still uses DWG as an exchange format. If your structural engineer needs a 3D wireframe, File > Export > 3D Model > DWG gives them a file they can xref into their drawing.
What is the precision ceiling? The stated tolerance is one-thousandth of an inch. In practice, that means a 10-metre distance resolves to about 0.025 mm — well below the tolerance of any construction material. The inference engine does not round coordinates, so arcs and circles stay mathematically accurate through scaling and section cuts. For joinery detailing at 1:1, the precision holds.
Are rendering engines supported? The 2026.2 build works with V-Ray 6, Enscape, and Twinmotion through their respective plug-ins. The Extensions migration process moves these over, but you may need to re-authorise the licence on first launch. GPU renderers that rely on CUDA will not use Apple Silicon natively; Metal-based renderers like the built-in ambient occlusion shader run without translation.
Why is the download size so large? The disk image carries both ARM and x86_64 binaries, LayOut, the Style Builder, sample materials, and about 200 component templates. A fresh install consumes roughly 5.8 GB on disk after the dmg is ejected. The dual architecture is the main contributor — stripping one slice would halve the footprint, but Trimble ships a universal binary for mixed-fleet studios.
Fitted wardrobes, CNC cut lists, and client grain previews
Claire runs a small workshop in Bristol. She designs fitted wardrobes and under-stair storage, sends cutting lists to a CNC shop, and presents renderings to clients who want to see the grain direction before they pay. She installed SketchUp 2026.2 on a Mac mini M2 Pro with 16 GB of RAM in January.
On a typical project — an alcove unit with shaker doors and a pull-out shoe rack — she starts by pulling the room dimensions from a laser measure. The numbers go into a blank millimetre template. She draws the alcove as a shell group, offsetting 10 mm from the measured walls to allow for plaster unevenness. The carcass is a separate component with adjustable shelves modelled as sub-components so the client can change the layout without redrawing anything.
She pulls door and drawer fronts from her local component library — shaker profiles she built in 2023 and refined through twelve jobs. Each front is a dynamic component with a dropdown for width and material. Changing a 600 mm door to 450 mm rebuilds the rail and stile proportions automatically. She places the handles as glued-to components so the client can see the projection from the side elevation.
For the cutting list, she uses the Outliner to name every panel and assigns a material tag — 18 mm MDF, 6 mm ply back, solid oak lipping. The list exports to CSV via a small Ruby extension that reads component definitions and reports dimensions. The CNC shop receives the CSV alongside a 2D DXF of the nested sheet layout exported from LayOut at 1:1 scale.
Before the client meeting, she sets up two LayOut sheets. Sheet one has a plan, front elevation, and a section through the shoe rack mechanism. Sheet two is a single perspective viewport with shadows set to 10:00 — morning light through the bay window that matches the client's actual room orientation. She exports the PDF and sends it. The client emails back with a change: swap the door style on the left cabinet. Claire opens the component options dropdown, selects "Slab" instead of "Shaker", saves, and re-exports. The whole revision takes four minutes. That is the difference between a model built with proper component hierarchy and one drawn as loose faces: the hierarchy makes the change trivial, and the layering makes the presentation consistent.
- Analysis — Analysis Hub introduced for interrogating model performance.
- Extensions — Extensions migration path implemented.
- Graphics — LayOut receives targeted graphics improvements.
- Interface — Mac-specific shortcut and UI fixes applied.
- macOS 13 Ventura or later (tested through macOS 26 Tahoe)
- Apple Silicon or 64-bit Intel processor
- 8 GB RAM minimum
- 6 GB available hard-disk space
Questions on file
Can I turn a 3D model into a presentation without extra software?
Yes, LayOut is included and builds multi-page documents with dimensioned drawings and title blocks, while the animation engine exports walkthrough and flythrough videos from the same model file.
Sign in · Create an account to add a field note.
No field notes yet. A measurement, a version, a machine — they appear after moderation.