Design
Sweet Home 7.5.7
DesignUpdated
| Requirement | On file |
|---|---|
| macOS | OS X 10.9 or later |
| CPU | Apple Silicon, Intel 64-bit |
| Download | 356 MB |
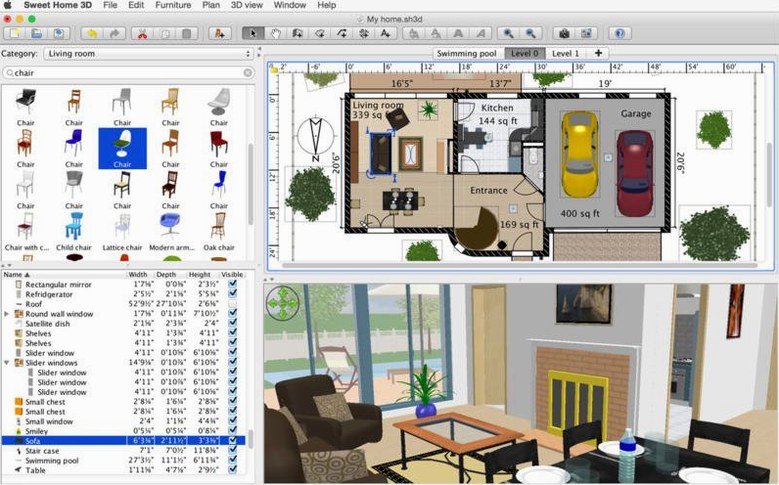
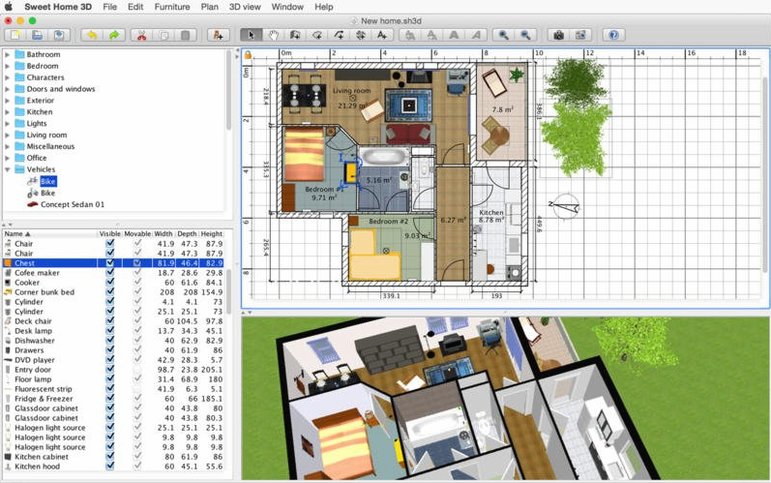
Sweet Home 3D is an interior design application that lets you draw a 2D house plan and walk through the result in a live 3D view.
- 2D Plan — The top-down drawing canvas where you position and resize walls, doors, windows and furniture.
- 3D View — A separate rendered window that updates as you edit, switchable between an aerial overview and a ground-level visitor viewpoint.
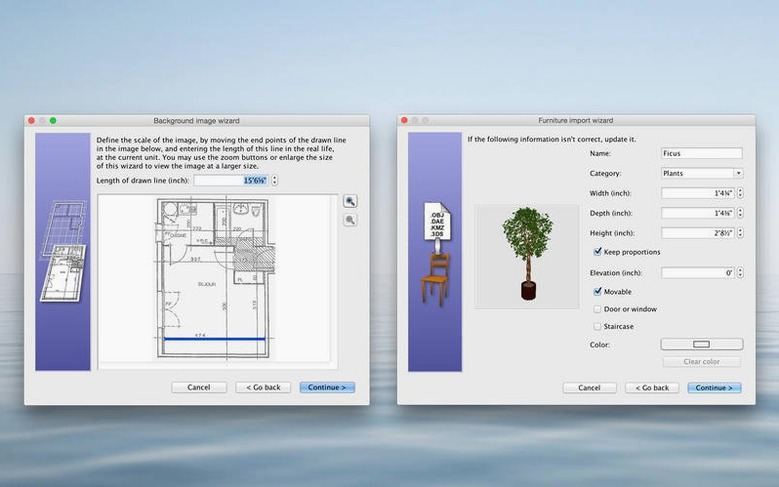
- Furniture catalogue — A built-in library of items, each adjustable for size, orientation, elevation, colour and texture. You can also import your own 3D models or ones downloaded from the web.
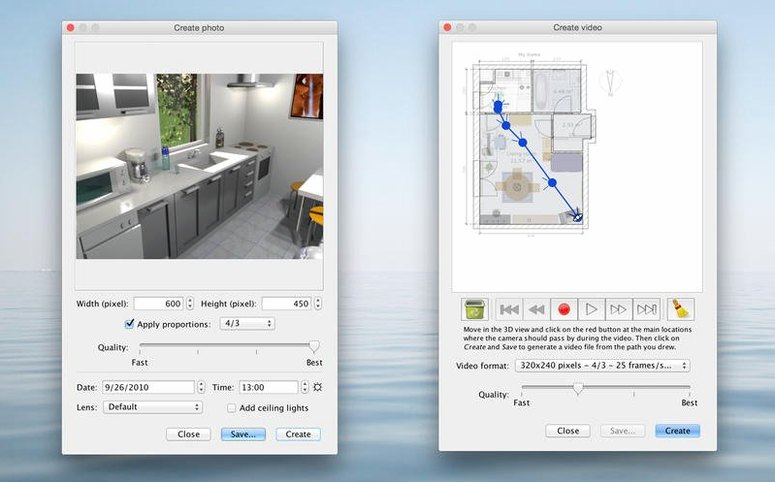
- Photorealistic rendering — A mode that calculates light and sun position to produce a still image of the scene with soft shadows and reflections.
- Export formats — Plans and 3D views can be saved as PDF, PNG, JPEG, SVG or OBJ files for use in other Mac apps like Preview, Pages or a 3D modelling tool.
The app runs natively on both Apple Silicon and 64-bit Intel Macs. It sits alongside a vector tool like Affinity Designer for post-processing a floor-plan SVG or a presentation app like Keynote for dropping in rendered room shots. The interface is available in 20 languages.
Three Preferences to Change After Your First Test Wall
Fresh from a sweet home 3d mac download, the defaults get you drawing immediately, but three preferences make a noticeable difference once you move past the first test wall.
Open File → Preferences and check Automatically check for updates off unless you want the prompt. More importantly, set Magnetism to on — this snaps wall endpoints together so you are not left with gaps that break room detection. The pixel setting controls sensitivity; 4 px works well on a standard 27-inch display, while 2 px suits a Retina screen where you need finer control.
Under the 3D view pane, raise the Antialiasing slider to at least 4× if your Mac has a discrete GPU. This smooths jagged edges on furniture and wall corners in the live 3D window without the rendering wait. Leave High DPI on for sharp output on a 5K display.
Two less obvious switches live in the Plan menu. Toggle on Display room area and Display room name once you have enclosed a few spaces. The area appears as a small floating label in square metres, and you can double-click any room to rename it from the default "Room" to "Kitchen" or "Bedroom". These labels export into the final plan, so setting them early saves a re-export later.
Workflow: Planning a Two-Room Home Office
Here is a concrete sequence from blank canvas to a rendered still, using a small home office conversion with a main work area and a sound-booth alcove.
- Set the wall thickness. Choose Plan → Modify walls and pick the 10 cm stud wall preset. Thinner walls waste less floor area in a small layout.
- Draw the outer shell. Select the wall tool and click-drag four walls for a 6.0 × 3.6 m rectangle. Watch the dimension readout at the cursor for accuracy; hold Shift to constrain to 90° angles.
- Split into rooms. Draw a dividing wall 2.4 m from the left edge, leaving a 1.2 m opening for a doorway. Sweet Home 3D automatically detects the two enclosed areas as separate rooms.
- Drop in doors and windows. Drag a door from the catalogue into the wall opening. Place two 120 cm slider windows on the outer walls; the app punches the wall openings automatically.
- Furnish each room. In the main area, add an L-shaped desk, an office chair, and a set of shelves. In the alcove, add a compact sofa and a low table. For each item, right-click and choose Modify furniture to set exact dimensions — the catalogue lists nominal sizes, but you can stretch a desk from 120 cm to 140 cm to fit your actual piece.
- Set colours and textures. Select a wall, open the colour picker, and apply a pale neutral (hex #F5F0E8 reads well under artificial light). Import a wood-floor texture from Finder for the floor surface. The changes appear live in the 3D view.
- Add a light source. Place a ceiling lamp from the Lighting category at the room centre. In the furniture modification panel set its power to 60%; one fixture at moderate power looks more natural than two at full blast.
- Render the final shot. In the 3D view, switch to the visitor viewpoint and position the camera at standing eye height (1.55 m) facing the desk. Open 3D view → Create photo, set quality to Best, and pick a late-afternoon sun angle through the window. Save the PNG.
Vector Export Path Into Affinity Designer or Sketch
The app does not try to be a full CAD suite, and that is exactly why it slots into a broader toolchain without friction.
Export a floor plan as SVG and open it in Affinity Designer or Sketch. The vector output preserves wall lines as editable paths, so you can add dimension annotations, electrical symbols or a title block that Sweet Home 3D's own plan view does not offer. For a quick presentation, drag a rendered PNG straight into a Keynote slide — the resolution holds up on a projector, and you can sequence several camera angles as build slides to show a client the progression from shell to furnished room.
macOS Quick Look works on OBJ exports: tap the Space bar in Finder to spin a 3D model of your exported scene without launching the app. The OBJ format also imports into Blender or Cheetah3D if you want proper material editing or fly-through animation beyond the app's built-in video creator.
The furniture catalogue folder lives at ~/Library/Application Support/eTeks/Sweet Home 3D. Drop a folder of OBJ or DAE models here, and they appear under a custom category in the catalogue panel. Dragging a model from Finder into the plan window also works and auto-imports it for the current session. If you find a furniture pack from a manufacturer's site — many European kitchen brands offer free 3D models — this is the friction-free way to pull it in.
For collaboration, export a PDF of the plan with room areas and dimensions visible, then annotate it in Preview with red rectangles or text notes. Send the marked-up PDF to a builder or a partner; they can print it at 1:50 scale without needing the app installed.
Fitting a Cutting Table and Mirror Without Blocking the Window
A costume designer is converting a spare bedroom into a fitting studio. She needs a layout that fits a large cutting table, a sewing station, a garment rail and a three-panel mirror — all without blocking the window light she relies on for colour matching.
She traces the existing room from a quick laser-measure session: 4.2 × 3.0 m, with a door on the short wall and a bay window on the opposite side. The built-in catalogue does not have a cutting table at the right height, so she downloads a free OBJ model from a kitchen-planning site and drags it into the plan. She sets the table to 90 cm high and 180 × 120 cm wide — large enough to spread a full bolt of fabric. The garment rail comes from the storage category and is stretched to 2 m. She places two LED panel lights from the catalogue, sets both to 70% power, and renders a quick photo from the doorway to check whether the mirror reflects the window or creates glare. It does, so she shifts the mirror 30 cm left and re-renders. The final plan exports as a PDF and goes to the landlord to show that no structural changes are needed — just furniture placement.
The whole session takes under an hour, and the only other app opened is Preview for the PDF markup.
- 3D view sync — Fixed synchronisation issues in the separate 3D view window.
- Underground rendering — Fixed 3D view rendering of underground levels at the same elevation.
- Thai localisation — Fixed font display in the Thai interface.
- OS X 10.9 or later
- Apple Silicon or Intel 64‑bit
Questions on file
Can Sweet Home 3D import furniture models from other sources?
Yes. You can import 3D models you have made yourself or downloaded from the internet to supplement the built-in furniture catalogue.
Sign in · Create an account to add a field note.
No field notes yet. A measurement, a version, a machine — they appear after moderation.