
Office
Scrivener 3.5.2
OfficeUpdated
| Requirement | On file |
|---|---|
| macOS | macOS 10.13 or later |
| CPU | Apple Silicon, Intel 64-bit |
| Download | 124 MB |
If you have ever tried to manage a long document in a standard word processor, you know the pain of scrolling endlessly and losing track of your research. Scrivener replaces that single-file model with a project-based system that keeps your draft, notes and supporting material in one window.
First Moves for a Newcomer
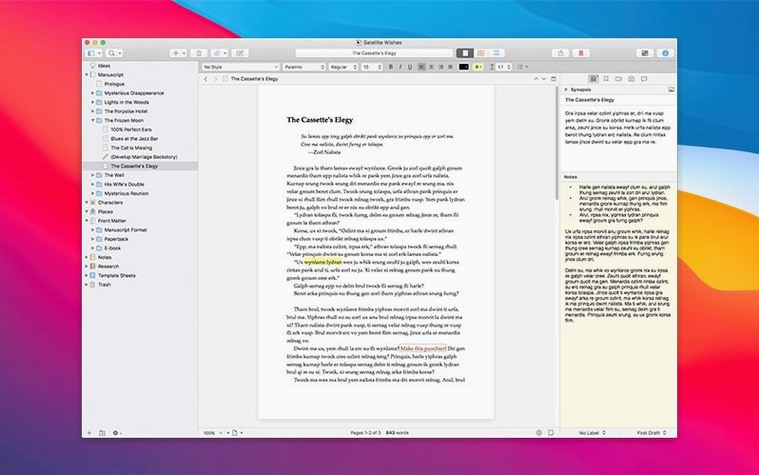
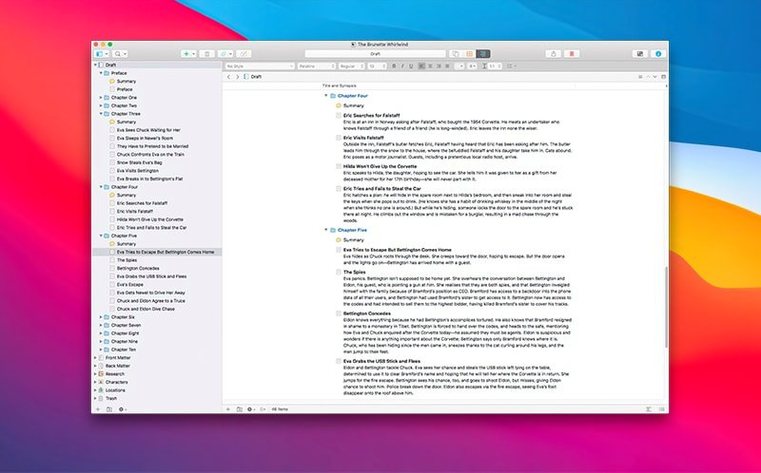
- Create a new project and set up the binder. A fresh project already contains a Research folder. Use folders to group chapters, scenes or topics. The binder on the left gives you a tree view of everything, and dragging items to reorder them is immediate.
- Bring in your supporting material. Drop PDFs, images, audio files and text notes straight into the Research folder. They sit alongside your draft, not in a separate app, so you can view a reference photo while typing in the editor.
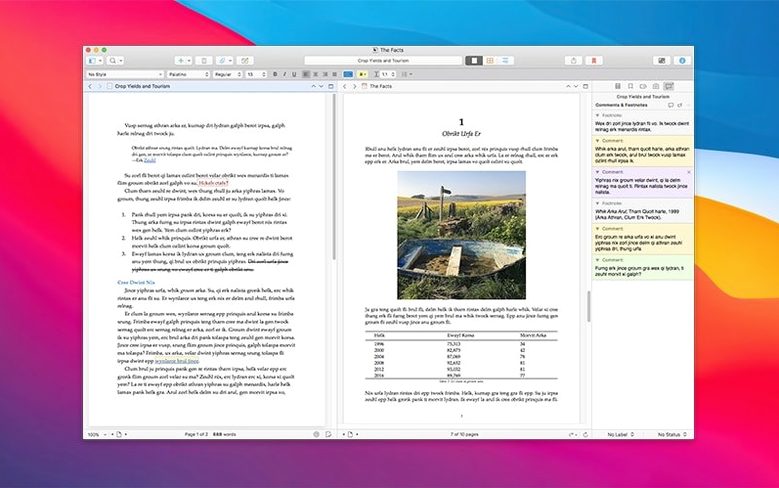
- Split the editor. Open a research file and a text document side by side in the same window. This is useful when transcribing an interview recording or following a PDF outline.
- Take a snapshot before a major edit. Snapshots record the state of a document at a point in time. You can roll back to a previous version without duplicating files manually.
Working this way makes assembling a thesis, script or long-form piece feel closer to arranging material on a physical desk, but with everything searchable and editable.
Lock the Cursor with Typewriter Scrolling
Scrivener ships with defaults that suit general use, but a few adjustments make the environment feel more like your own. The Editor pane in Preferences controls typewriter scrolling, which locks the insertion point to a fixed vertical position. Turn it on if you dislike typing at the bottom of the screen. The same pane lets you set a page guide line—a faint vertical rule at a character count you choose—useful for column writing or keeping paragraphs within a readable measure.
Switch to the General tab and disable "Show start panel when there are no open projects." After the third launch, that panel adds a click you do not need. Under Editing, the "Insert and delete" section has a checkbox labelled "Use tab key to indent text." With it off, Tab moves focus between binder and editor, which is faster for keyboard-driven navigation.
One setting buried in Sharing is worth a look: "Default compile format." Set it to the output you use most—PDF, DOCX, or plain text—so the compile dialogue opens with the right choice pre-selected. It saves a few seconds each session, and those add up over a long project.
Tap Space for a Floating Quick Reference Panel
Scrivener rewards the curious. A handful of features sit just below the surface and never announce themselves with toolbar icons.
- Quick reference panels. Select any document and press
Space. The file opens in a floating window that stays on top of other panes. You can have several open at once, each remembering its own scroll position. Ideal when you need to check a character sketch while drafting a scene. - Project statistics in the footer. Click the small target icon in the bottom-right corner of the main window. A pop-up shows word and character counts for the current selection, the document, and the entire draft—all updated live. No menu diving required.
- Collections from search results. Run a project-wide search, then click "Save Search as Collection" from the search bar's gear menu. The result becomes a smart folder in the binder, updating as you add or edit documents. Old notes tagged with a client surname resurface without manual sorting.
- Label and status shortcuts. Right-click any binder item and assign a label colour or a status stamp from the context menu. These appear as coloured dots and text tags beside the title. Filtering the binder by label takes two clicks and instantly isolates, say, every scene marked "First draft."
- Composition mode opacity. Enter full-screen composition mode, then nudge the background opacity slider that appears when you move the pointer to the top of the screen. At 85%, your desktop fades enough to remove distraction but remains dimly visible if you need to glance at another window.
30-Chapter Manuscripts Mapped to the Binder Hierarchy
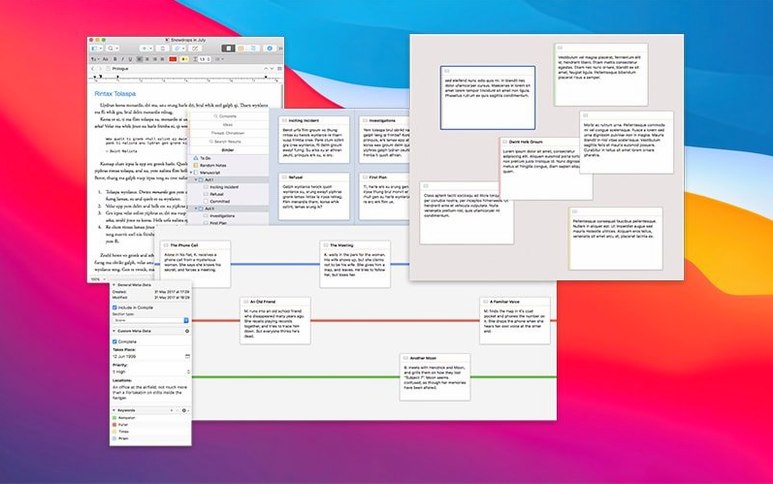
Scrivener suits Mac users who work on structured, long-form text where the piece outgrows a single document. Novelists fit that description naturally. A manuscript with 30 chapters, each containing several scenes, maps cleanly onto the binder-and-folder hierarchy. The corkboard view—index cards arranged on a grid—lets a writer see chapter summaries at a glance and drag scenes into a new order without cutting and pasting text.
Screenwriters and playwrights benefit from the scriptwriting templates, which format dialogue, character cues and scene headings as you type. The research folder holds location photos and treatment notes, while the split editor keeps a script page and a reference image visible together.
Researchers and journalists use the Research folder differently. A project might hold interview transcripts as text files, audio recordings of calls, PDF briefings and a running draft of the article. Everything lives in one portable package—a single .scriv file on disk—so backing up or moving a story between machines means copying one item.
Students working on a thesis or dissertation gain from the snapshot system. Before a supervisor meeting, take a snapshot of every chapter. After the meeting, apply changes with the confidence that the previous state remains recoverable. The binder grows naturally from proposal notes through literature review to final chapters, and compile turns the whole tree into one formatted PDF.
If your writing leans short-form—blog posts, emails, social captions—or demands real-time collaboration with tracked changes, Scrivener adds overhead you probably do not need. The compile step, however flexible, is still a step. A plain text editor or a collaborative web document may serve those tasks with less friction.
Stability Fixes for Apple Silicon Redraw Glitches
Scrivener 3.5.2 arrived in December 2025 as a bug-fix release. The developer's notes do not list new features for that update; it addressed stability issues reported against earlier 3.x builds. Users on Apple Silicon Macs saw fixes for occasional redraw glitches in the binder when scrolling quickly through large project trees. A handful of crashes tied to the compile dialogue on macOS Sequoia were also resolved.
The larger arc of the 3.x series brought Dark Mode support, a rewritten compile engine with better DOCX export fidelity, and the ability to store project backups in a custom location. For everyday use, the compile improvements matter most. A novel exported to DOCX now preserves heading styles more reliably, which means less reformatting before sending a manuscript to an editor or beta reader. The custom backup path, set once in Preferences, lets you point automatic backups to a cloud-synced folder without moving the entire project there—a practical safeguard against drive failure.
The 7:30 am Project Loads Right Where You Stopped
You open Scrivener at 7:30 am with coffee. The project from yesterday loads automatically because you left it open last, and the binder shows Chapter 12 selected—right where you stopped.
First, you tap Space on the character notes file in the Research folder. It floats open in a quick reference panel. You drag the panel to the right edge of the screen, resize it narrow, and scroll to the section about a minor antagonist's speech patterns. The main editor holds your draft scene.
You write for 40 minutes. The word count ticks up in the footer as you go. Halfway through, you realise a scene you wrote last week should move here. You open the binder, find "Scene 4" under Chapter 8, and drag it into Chapter 12 between the current scene and the next. The corkboard refreshes; the index card order updates. No text was cut or pasted.
At 8:15, you import a PDF research paper you downloaded the night before. You drag it from Finder directly onto the Research folder in the binder. It appears as a clickable item. You split the editor horizontally—draft on top, PDF on the bottom—and scroll the PDF to a highlighted paragraph. A statistic from that paragraph goes into the draft. You close the split with one click.
Before a mid-morning break, you select all documents inside the "Draft" folder and take a snapshot with Cmd-5. The snapshot panel shows a growing list of dated versions. You type a short label: "Pre-structural edit pass."
After the break, you open Collections and click the smart collection you built last week: "Scenes flagged with a red label." Three scenes still need revision. You work through them one by one, clearing the red label as each is finished. By noon, the collection is empty.
Finally, you compile the draft to a DOCX for your writing group. You pick the "Manuscript (Courier)" format, check the "Front matter" checkbox to include your title page, and click Compile. The file lands on your desktop in under ten seconds. You close Scrivener. The session auto-saved continuously—there is no save prompt, no confirmation dialogue, just the project file sitting ready for tomorrow.
- macOS 10.13 or later
- Apple Silicon and 64-bit Intel Macs
Sign in · Create an account to add a field note.
No field notes yet. A measurement, a version, a machine — they appear after moderation.