VST Plugins
LFOTool 1.768
VST PluginsUpdated
| Requirement | On file |
|---|---|
| macOS | OS X 10.11 or later |
| CPU | Apple Silicon, Intel 64-bit |
| Download | 7 MB |
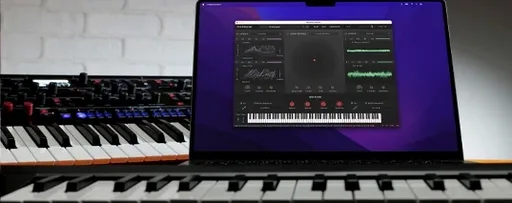
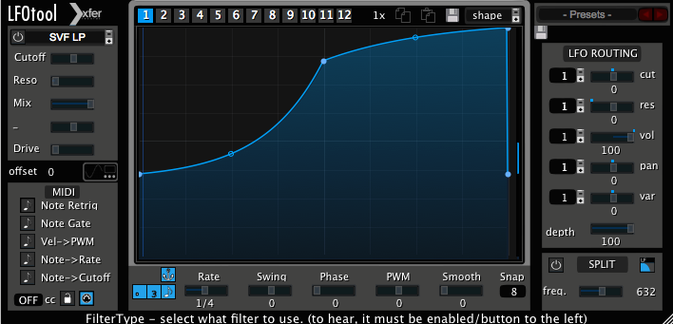
A static filter sweep or a DAW's stock tremolo can only go so far before the movement feels mechanical. LFOTool steps in where basic automation lanes and single-waveform LFOs run out of range, giving you four simultaneous, user-drawn modulation graphs that lock to your project tempo with sample-accurate sync.
Plugin Specs & Typical Insert Slot Placement
| Detail | Spec |
|---|---|
| Version | 1.768 |
| Developer | Xfer Records |
| Format | VST, AudioUnit |
| macOS requirement | 10.11 or later |
| Architecture | Intel & Apple Silicon |
In a typical session, LFOTool sits on insert slots where you would normally place a compressor, panner or filter plug-in. Drop it on a bass bus and draw a sharp downward envelope to simulate sidechain pumping without routing a dummy kick. Place it on a pad track, assign one graph to cutoff and another to resonance, then offset their phase for a shifting, organic texture that stays locked to BPM. A third graph can handle pan position, while the fourth sends MIDI CC messages out to a hardware synth or another plug-in — turning LFOTool into a modulation bridge between your DAW and external gear. Rate can be set in hertz for free-running wobbles or synced to tempo with adjustable swing. Dozens of factory presets cover common starting points like auto-pan, trance gate and tremolo, and every curve point is editable so you are never stuck with a preset shape. The plug-in loads in any VST or AudioUnit host on macOS 10.11 and later, on both Intel and Apple Silicon machines.
Where LFOTool fits in a real session
LFOTool rarely works in isolation. The most useful workflows treat it as a modulation hub that bridges audio processing and MIDI routing across a project. In a VST or AudioUnit host, you can place an instance on an audio track to shape amplitude, filter cutoff or pan, then instantiate a second copy on a MIDI track to send CC data upstream to a soft synth on another channel. Both instances can share the same rate and phase offset, effectively synchronising audio ducking on one bus with a parameter sweep on an instrument three tracks away.
For users who run hardware alongside a DAW, the MIDI CC output becomes a bridge to outboard gear. Route LFOTool's MIDI stream to a physical output, and a drawn curve can sweep a hardware synth's filter or modulate an external effects unit's parameters — all locked to the project tempo. This works especially well with desktop monosynths and rack units that respond to CC messages but lack their own tempo-synced modulation engines. Because the plug-in supports sample-accurate sync, timing jitter between the DAW timeline and external gear stays negligible, even at 16th-note swing settings.
On the macOS side, LFOTool slots into Audio Hijack-style routing setups without complaint. Anyone using a virtual audio driver to process system audio or route between apps can drop it on a system-wide effects chain and apply tempo-synced gating or filter movement to any source — a video stream, a software instrument running standalone, or a live input. The AU format loads in Logic Pro's sidechain-compatible insert slots, while the VST works across Bitwig, Ableton Live, Reaper and others, so the plug-in adapts to whichever host handles your routing. No bridging utilities required on Apple Silicon machines: the native ARM build loads directly without Rosetta.
Drawing Sidechain Envelopes for Four-on-the-Floor Pumping
Electronic producers working in four-on-the-floor genres tend to reach for LFOTool first. The sidechain-simulation curve editor replaces the entire kick-routing chain for many: draw a sharp downward envelope, adjust the tension handles to soften the release, and the pumping effect matches or exceeds what an external compressor would deliver, with zero latency from a ghost kick. Bass music producers exploit the multi-graph feature differently, assigning one curve to volume gating for rhythmic articulation, a second to a low-pass cutoff, and a third to resonance, creating modulated basslines that shift timbre on every 16th note. Trap and hip-hop beatmakers often keep it on an 808 bus, using a single graph to tighten the sustain of long sub notes without needing to chop the audio.
Sound designers working in post-production or game audio benefit from the hertz-based rate mode. When tempo sync is irrelevant — say, for a slow atmospheric sweep on a drone layer — switching the LFO rate to a free-running 0.8 Hz cycle produces movement that drifts naturally against the timeline. The point-and-tension curve editor supports sharp right angles and smooth S-curves in the same graph, so a single instance can cycle through complex, multi-stage modulations that would require three stacked effects in a traditional chain. Presets provide a launch point, but the real power lies in pulling a factory trance gate preset apart, studying its graph tension, and rebuilding it for a completely different source.
Mix engineers who process live bands use LFOTool more sparingly, but with intent. A four-graph setup on a drum room mic can gate the signal, filter low-end rumble, pan the stereo image slightly, and send a MIDI CC to a reverb plug-in's decay time — all triggered by the same LFO cycle. Because up to 12 graphs can live in a single preset and be switched via MIDI notes or automation, you can program verse, chorus and bridge modulation settings into one instance and flip between them with a single key press.
Solving MIDI CC Routing from Host to Target
The most frequent stumbling block is MIDI routing. LFOTool generates CC messages, but the host DAW must be configured to forward that MIDI stream to the target instrument or hardware port. In Logic Pro, this means loading the plug-in on a software instrument track set to the correct MIDI channel, not on an audio insert. In Ableton Live, routing requires a second track set to receive MIDI from the LFOTool instance. Users who skip this step see the graph move but hear no effect on the target — the modulation is leaving the plug-in but never arriving. Checking the host's MIDI routing matrix or track I/O settings almost always resolves it.
Another recurring issue involves phase alignment between multiple graphs. Four graphs running simultaneously can drift against each other if one is set to a different rate denominator. The fix is straightforward: open the graph whose timing feels off, verify the rate multiplier, and either match it to the others or deliberately offset it by a known fraction. LFOTool does not display phase in degrees, but the graph editor's grid makes it easy to eye a quarter-cycle or half-cycle shift.
Users moving between Intel and Apple Silicon machines occasionally note that older projects load the Intel version by default. Forcing the host to scan and select the ARM build clears this up. On macOS 10.11 through 10.14, the VST and AU versions require a host that supports 64-bit plug-ins, and a few older DAWs still running 32-bit bridges will reject the plug-in outright. Checking the host's plug-in manager for the correct architecture string confirms whether the system sees the right build.
Right-Click to Reset Tension Handles to Linear
The curve editor's tension handles respond to right-click resets. If a point's tension has been pulled into an extreme S-curve and you want to return it to linear, right-clicking the handle snaps it back to default — faster than dragging by hand. Double-clicking an empty area of the graph adds a new point directly on the clicked value, which speeds up drawing complex shapes without hunting for an 'add point' menu item.
Preset switching via MIDI notes uses note number 0 as the first graph set, note 1 as the second, and so on. If you program a C-2 note and nothing changes, your controller or piano roll may be sending an octave higher than expected. The plug-in listens across the full MIDI note range, so transposing the trigger note up or down an octave usually finds the slot.
The swing parameter affects only tempo-synced rates, not hertz-based ones — a detail easy to overlook when switching between sync modes mid-session. If the groove suddenly straightens out, check which rate mode is active. Similarly, MIDI CC output halts when the transport stops in most hosts, but a few DAWs (notably Reaper with certain buffering settings) continue to send a tail of messages. Toggling the host's 'silence on stop' or 'flush MIDI' preference stops stray modulation from hitting a hardware synth after playback ends.
A minor ergonomic touch: the graph colours are not cosmetic. Each of the four active graphs uses a distinct colour that matches its target parameter label — cutoff, resonance, pan and volume — so at a glance you know which line controls which destination, even when curves overlap in the editor view.
- macOS 10.11 or later
- Intel or Apple Silicon processor
- VST- or AudioUnit-compatible host application
Questions on file
Can LFOTool send modulation to other plug-ins and hardware?
Yes, one of its four graphs can output MIDI CC messages to software instruments, effects plug-ins, or external MIDI hardware.
Sign in · Create an account to add a field note.
No field notes yet. A measurement, a version, a machine — they appear after moderation.