VST Plugins
Serum 2.0.24
VST PluginsUpdated
| Requirement | On file |
|---|---|
| macOS | macOS 10.13 or later |
| CPU | Apple Silicon, Intel 64-bit |
| Download | 30 MB |
Serum is a wavetable synthesizer plugin built for creating, importing, editing and modulating wavetables in real time. Version 2.1.5 runs on macOS 10.13 or later, on both Intel and Apple Silicon Macs, and loads inside any host that supports the VST or AU plug-in formats.
Oscillator Architecture
- Each wavetable oscillator can stack up to 16 voices with advanced unison parameters.
- Stack settings let you layer notes — octaves and other intervals — so a single keypress sounds fuller.
- Real-time wavetable transformation and modulation are available across all oscillators.
Dual Filters and Effects
The plugin includes dual filter types, letting you control or switch between two filter paths. Among the options are filter types borrowed from LFOTool plus several new additions. The effects section supplies flangers, phasers and comb filters, all capable of tracking the musical note you play — a useful detail when you want modulation to stay in tune with the material rather than drifting at a fixed rate.
Ignoring Gain Staging Destroys Your Initialized Patch
Opening Serum for the first time and flicking through presets is straightforward. The trouble starts when someone tries to build a patch from scratch. A few patterns show up again and again.
The most common mistake is ignoring gain staging. Serum's oscillators run hot by design. Stack a 16-voice unison patch, route it through both filters with resonance up, add the tube distortion from the FX section, and the output clips before you have touched the master volume. Beginners hear the harshness and assume the synth sounds thin or digital, when the real problem is that they have pushed the signal 12 dB past the red. Pull the oscillator level back to around -6 dB, ease off the FX mix knobs, and suddenly the same patch breathes.
Another frequent misstep is treating the mod matrix as an afterthought. People dial in a wavetable position by hand, find a spot they like, and leave it static. A wavetable that does not move is just a single-cycle waveform with extra steps. The whole point is modulation. Map an LFO to wavetable position, set it to a slow triangle wave, and the sound gains a living, evolving quality that no static waveform can fake.
Beginners also overuse the Hyper/Dimension effect. It is the easiest way to make a thin patch feel wide in seconds, so it ends up on everything. The result is a mix where every element sounds smeared across the stereo field, with no centre left for kick, snare or bass. Try pulling the Dimension mix down to 15–20% and using it on only two or three elements. Let the rest stay narrower and place them with panning instead.
One subtle error is misunderstanding the global unison settings versus the oscillator-level stack controls. The global Unison Detune knob in the main voice section affects all voices equally. The per-oscillator Stack panel gives you independent detune, pan spread and phase control. Someone who cranks both ends up with a detuned saw stack layered three octaves deep, then wonders why the bass patch has no punch. The fix is simple: keep sub content mono and tight, then add stereo width higher up the frequency range.
Finally, ignoring the noise oscillator. It is easy to treat it as an afterthought — a bit of vinyl crackle or wind. But the noise oscillator can load any sample, and it has its own filter and envelope. Dropping a short transient sample in there, keytracking it, and blending it subtly behind a pluck patch adds a front-edge snap that makes the sound cut through a dense arrangement without raising its perceived volume.
Workflow: Building a Bass Patch from an Init State
Here is a walk-through for constructing a tight, mid-range bass patch suitable for a drum-and-bass or garage context. No presets, no shortcuts — every step from init.
- Load Serum on a new MIDI track. Hold Opt and click the Menu button in the top bar, then select Init Preset. This clears everything to a single saw oscillator, no modulation, no effects.
- In Oscillator A, keep the default sawtooth. Set voices to 4. Open the Stack panel and set Octave to -1, Detune to 0.08 and Stereo to 0%. The sub layer needs to stay mono and phase-coherent.
- Enable Oscillator B. Change its wavetable to one of the analogue-modelled squares — Analog Squares under the Digital category works. Set its level to about 60% and tune it an octave higher than Oscillator A. This adds harmonic bite without muddying the fundamental.
- Open the Filter section. Set Filter 1 to a 24 dB low-pass, cutoff around 400 Hz, resonance at 15%. Enable key tracking so higher notes open the filter slightly more. Set Filter 2 to a 12 dB band-pass, cutoff around 800 Hz, and route Oscillator B into it at around 40% via the filter routing panel. This carves a pocket for the square wave's harmonics to poke through.
- Go to Envelope 1. Set a fast attack (0 ms), a short decay (around 200 ms), sustain at 0% and a quick release (around 50 ms). Assign Envelope 1 to the cutoff of Filter 1 in the Mod Matrix, amount around 40%. Now the filter snaps open on each note and closes quickly, giving the bass a percussive front edge.
- Assign LFO 1 to the wavetable position of Oscillator A. Set LFO 1 to a sine shape, rate synced to 1/4 note. Amount around 15–20%. The sawtooth morphs subtly across the cycle, keeping the tail of longer notes from sounding static.
- In the FX tab, add a small amount of compression — 2:1 ratio, fast attack, medium release, gain reduction around 3 dB. This tames the peaks from the unison stacking without squashing the dynamics. Add the tube distortion at 10% mix for warmth.
- Enable the EQ in the FX chain. Cut sharply at 30 Hz with a high-pass to clear subsonic rumble. Dip 2 dB at 250 Hz if the low-mids sound boxy, and boost 1.5 dB at 1.5 kHz for presence.
- Assign Macro 1 to Oscillator A's wavetable position and Macro 2 to the cutoff of Filter 1. Now you can perform the patch live, opening the filter and shifting the waveform with two knobs.
The result is a bass sound that holds down the low end with the sub layer, cuts through the mix with the band-passed square, and stays interesting over sustained notes thanks to the LFO-driven wavetable movement. Save it, then tweak the macros while recording automation — the patch will produce several usable variations before you need to open a new instance.
Adjust Global Preferences Before You Build Your Next Patch
Serum ships with sensible defaults, but a handful of preferences and global settings make a noticeable difference in daily use. These are worth adjusting before you build your next patch.
Oscillator Display Quality
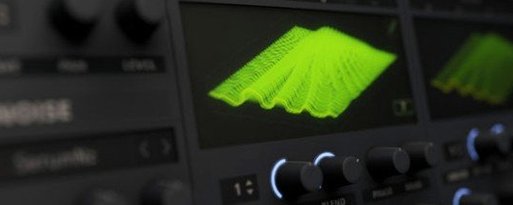
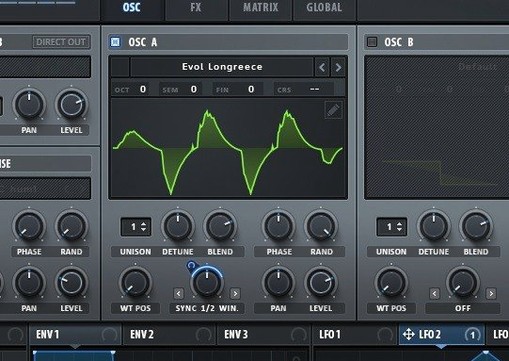
Open the Global preferences (the gear icon in the top-right corner) and set the wavetable display to High Quality. The default setting reduces the render resolution of the 3D wavetable view to keep CPU usage low on older machines. On any modern Mac — Apple Silicon or a recent Intel chip — the performance hit is negligible, and the waveform view becomes sharp enough to see fine details when you are editing wavetable frames manually.
Default Pitch Bend Range
Serum defaults to a ±2 semitone pitch bend range. That is fine for subtle vibrato but frustrating if you use a MIDI keyboard with a pitch wheel and expect ±12 semitones for leads and basses. Set it to ±12 in the Global tab. If you need a smaller range on a specific patch, you can override it per-instance, but the global setting covers most use cases.
Drag-and-Drop Behaviour
Check the Drag & Drop Wavetables as 2048-sample option in the Global tab. When you drop an audio sample onto Serum's wavetable display, it converts the audio into a wavetable automatically. The resolution of that conversion matters. 2048 samples per cycle gives you smoother interpolation and fewer artefacts when sweeping through the table compared to the lower default. The trade-off is slightly larger memory usage per oscillator, which on a Mac with 16 GB or more of RAM is rarely a concern.
Disable Animations on Lower-Spec Machines
If you run Serum on an older Intel MacBook Air or a machine with limited graphics capability, the animated wavetable and LFO displays can cause GUI lag. In the Global preferences, reduce the animation refresh rate or disable the wavetable animation entirely. The synth sounds identical; only the visual feedback changes. On Apple Silicon machines, leave animations on — the GPU handles them without breaking a sweat.
How Serum Compares with Similar Mac Synths
Placing Serum next to other wavetable and hybrid synths clarifies where it fits in a producer's toolkit. Three comparisons stand out.
Serum vs. Vital
Vital is the closest direct comparison — another wavetable synth with a drag-and-drop modulation system, three oscillators, and a spectral oscillator mode that Serum does not offer. Vital's spectral morphing can warp a sample into unrecognisable textures, which gives it an edge for sound design that starts from recorded audio. Serum counters with a more mature filter section: the dual-filter routing, the LFOTool-derived filter types and the note-tracked comb filters are more flexible than Vital's simpler filter block. The unison stacking in Serum also goes deeper — 16 voices per oscillator with independent warp and position controls — while Vital caps at lower voice counts and lacks the per-voice wavetable offset feature. For raw oscillator horsepower and filter routing, Serum stays ahead. For spectral resynthesis and a free entry point, Vital pulls its weight.
Serum vs. Arturia Pigments
Pigments combines wavetable, virtual analogue and sample-based engines in one plugin. Its modulation system uses a similar drag-and-drop approach, and its effects rack — pulled from Arturia's modelling expertise — includes some characterful reverbs and delays that Serum's effects section does not attempt to replicate. Pigments also offers a polyrhythmic sequencer built into the interface, which Serum lacks. Where Serum pulls ahead is in the depth of its wavetable editing. Pigments can import wavetables and do basic morphing, but Serum's manual editing mode — where you draw harmonics, apply FFT-based processing to individual frames, and crossfade between hand-drawn shapes — gives you granular control that Pigments does not expose. Serum also responds faster to real-time wavetable modulation; Pigments can feel slightly smoothed out in comparison. Choose Pigments when you want a self-contained production station with sequencing and lush effects. Choose Serum when the wavetable itself is the centre of the sound and you plan to modulate it heavily.
Serum vs. Native Instruments Massive X
Massive X shares Serum's focus on wavetable synthesis but takes a different approach to routing. Its oscillator section includes a phase modulation mode and a number of esoteric warp modes that produce results Serum cannot replicate without external processing. The routing is semi-modular: you drag connections between modules, and the signal path is more flexible than Serum's fixed oscillator-to-filter-to-FX architecture. The downside is that Massive X's interface is denser and less immediate. Serum's modulation system — where you drag a source onto any target and see the amount on screen — is faster to learn and faster to use during a session. Massive X's presets also tend toward cinematic and experimental textures, while Serum's factory library covers a wider range of electronic music styles. If you need phase modulation and complex feedback paths, Massive X earns its place. If you need to build a playable, expressive patch in ten minutes without consulting the manual, Serum is the more streamlined tool.
A Real-World Scenario: Sound Designer on a Tight Deadline
A sound designer working on a sci-fi game soundtrack needs fifteen distinct UI interaction sounds — button clicks, confirmation chimes, error buzzes — by the end of the day. The brief calls for sounds that feel tactile and synthetic, not sampled from real-world objects.
She opens Serum, starts from an init patch, and within five minutes has a short, glassy ping: a sine wave on Oscillator A with a fast exponential decay on Envelope 1, routed to the global amplitude, plus a touch of the reverb effect set to a small room size. She assigns the wavetable position to a random LFO with a very short cycle, so each trigger produces a slightly different harmonic. By duplicating the instance and swapping the wavetable to a bell-like spectral shape, she generates a set of confirmation tones that share a family resemblance but never repeat exactly.
For the error buzzes, she loads a sawtooth into Oscillator A, stacks it four voices deep with heavy detune, and routes it through the comb filter with note tracking off. A slow LFO sweeps the comb filter frequency, creating a metallic, angry texture. She adds sample-rate reduction in the FX chain at 8 kHz, no interpolation, giving the sound a harsh digital edge that reads as "wrong" instinctively. The whole patch uses only Serum's internal effects — no external processing — so the project file stays portable and the game's audio programmer can tweak parameters later without needing extra plugins.
By using the macro system, she maps the most expressive parameters — filter cutoff, wavetable position, LFO rate — to four knobs and records quick automation passes for each UI event. The entire set of fifteen sounds comes from three Serum instances, each with different macro snapshots saved as separate presets. The work is done in under three hours, and every sound is a custom wavetable patch, not a layered sample library. That kind of speed relies on knowing the init-to-finished-patch workflow cold, keeping modulation assignments tidy, and resisting the temptation to stack effects that could be added in the DAW later.
Area — Change
- Host compatibility — Added an Ignore VST3 Note IDs setting to work around note identifier issues in certain hosts.
- Pro Tools — Added support for automatable parameter shortcuts.
- Project loading — Fixed data loss when opening projects and sessions created in newer versions of Serum 2.
- Digital Performer — Fixed tooltip display and resolved periodic crashes.
- File import — Fixed loading of ACIDized WAV files containing empty strc chunks.
- Bitwig Studio — Fixed Clip Player macro automation updates.
- MPE — Fixed MPE value retention after voice stealing.
- Piano Roll — Note preview now respects the velocity of the note being auditioned.
- Stability — Fixed a possible crash when passing malformed data to the Serum processor.
- Settings UI — Restored the settings interface, which was broken starting from version 2.0.22.
- Preset browsing — Fixed Previous/Next preset selection so that loading a session no longer incorrectly jumps to ARP — Aardvark.
- Windows — Fixed a Pro Tools hang on shutdown in Windows.
- Windows scaling — Fixed incorrect interface scaling in JUCE-based hosts when Windows Display Scaling was not set to 100%.
- macOS 10.13 or later
- Apple Silicon or Intel 64-bit processor
Questions on file
What filter types are included in Serum 2.1.5?
It includes filter types found in Xfer's LFOTool, a set of additional new filters, and dual filter routing that lets you control or switch between two filter paths.
Sign in · Create an account to add a field note.
No field notes yet. A measurement, a version, a machine — they appear after moderation.